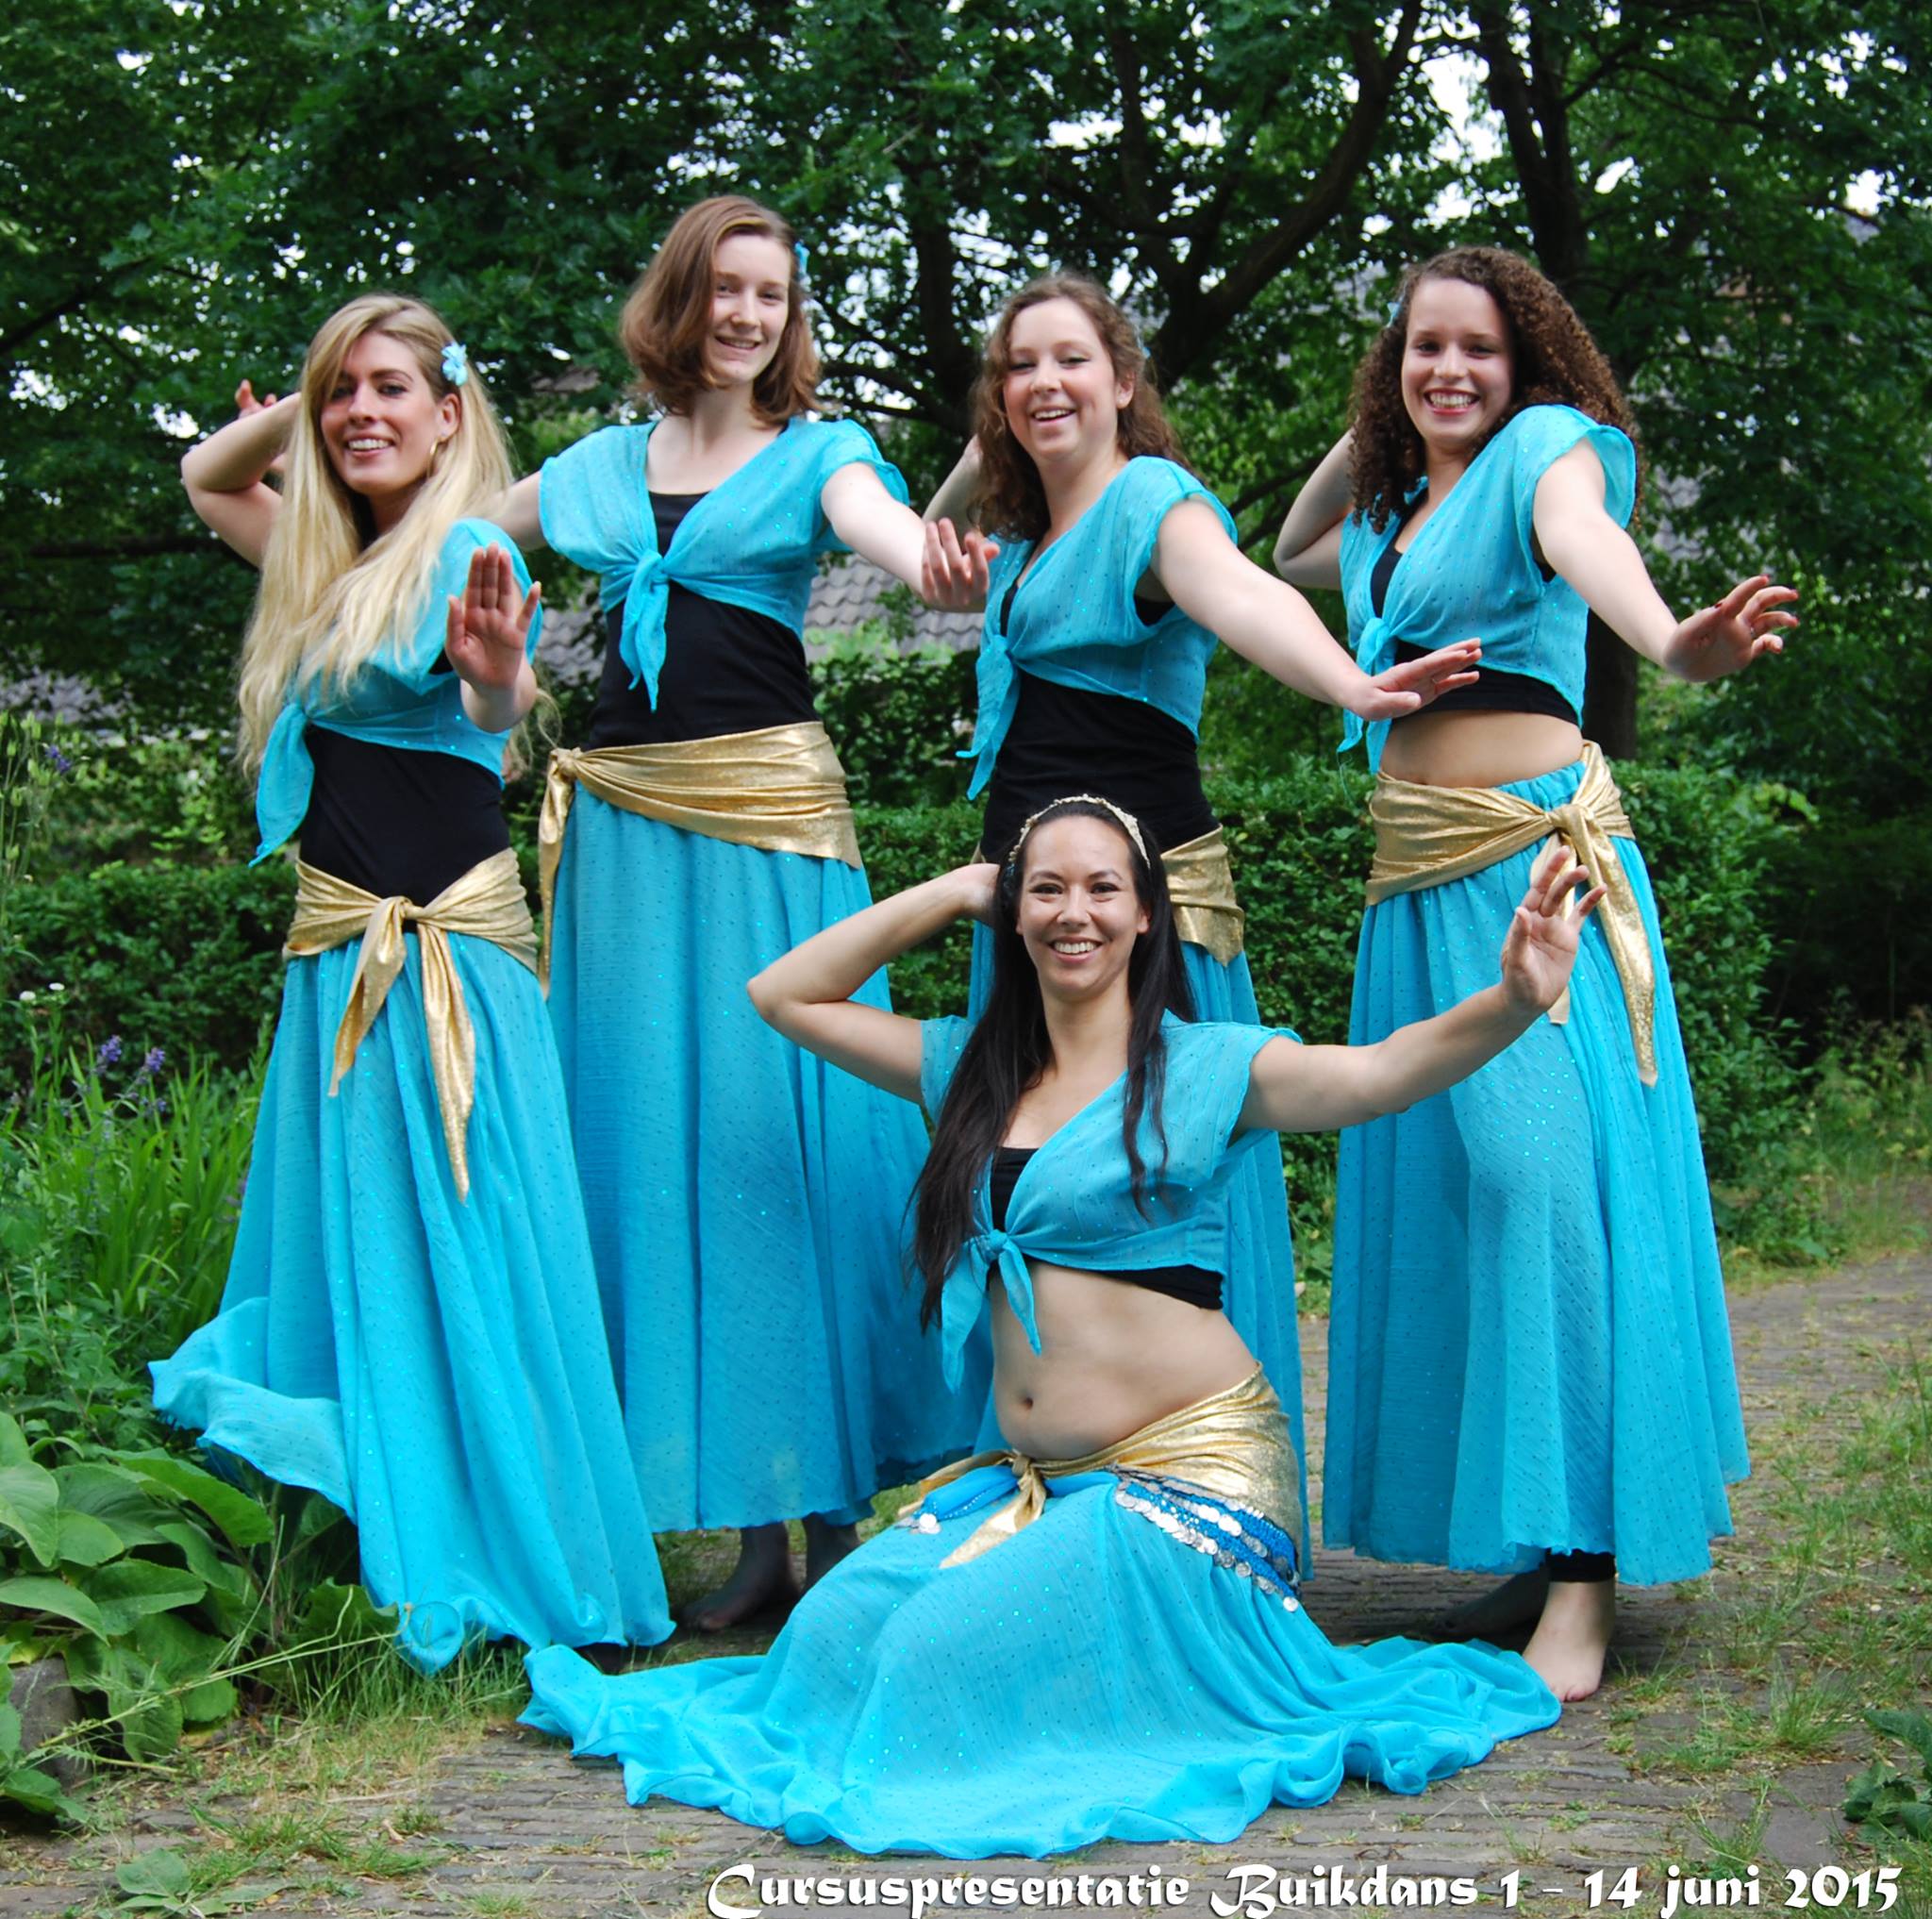
I measure time by remembering how long ago the Corona pandemic hit. Because that was the moment when a lot of my belly dance activities stopped. No performances, no hafla’s and no deadlines to create new belly dance costumes. With the increased the vaccination rate in our country I have some events and performances to look forward too. Time to dive into my closet and get some stuff together!
Instead of creating a completely new costume, I bought some second hand items in need of TLC. Partly because I love the beaded style and look of ‘vintage’ costumes and partly because at this moment I don’t have the time and resources to create a costume from scratch. Today I present to you: the hipscarf with corroded coins.
Triage
This scarf is part of a set with a top and a skirt and the main issue is that the gold coins have tarnished. The beading and fabric is still in excellent shape. As I want to wear this costume for performances and there are no coins on the skirt or top I replaced the coins with large holographic gold sequins. But before I could get started, it was time to deconstruct!
Wearing the costume right after unpacking. Notice the skirt being too short and the tarnished coins on the hipscarf
The coins were attached with gold beads, which also lost their shine. I removed the beads and the coins completely from the scarf and started rebeading with large gold rocaille beads and 3 cm big laser sequins.I choose the larger sized beads because I am going for a bigger visual impact, and he larger beads work well with the large sequins. There were also little clusters of fringe scattered over the hip scarf. I took these off for replacement too.
Picture of a rather sad looking three strands of beaded fringe ending in tarnished coins
I can’t stress enough how much easier it is to use bigger beads fir these kind of beading. Easier to pick up beads, easier to string and faster to finish. What’s not to love? And doesn’t the new cluster fringe look sparkly?
Close up of three strands of beads ending in a large gold sequin
Rebeading the edge took most of the time, I did this in four one hour sessions to make sure I wasn’t putting too much repetitive strain on my hands.
Close up of the new beaded edge with sparkly sequins
There was however one more thing. The hipscarf sort of matched the skirt and top, but did not have similar silver beading. So I unpicked the hearts of the flowers and redid them in silver seed beads to make the scarf match the costume. I did not take pictures after adding the silver beading so you’ll have to wait for the pictures of the finished costume 🙂
This blog is mostly about the process of how I made my belt and appliquées. Let’s get started! For the record, I write this blog after I finished the costume and did the photoshoot. No worries, I got it done in time!
Making a plan
When I start on a costume I usually make a lot of sketches and research fabric options but this was a bit on the fly. Instead I bought the course including the pattern book from Sparkly Belly. Any time that I could save would be most welcome. After printing the pattern book , I adjusted the belt design to make it more unique and add a bit to the sides or center so it would fit around my hips.
The holographic gold print lycra was already in my stash. I used it three years ago to cut hipscarfs for my beginners recital. Quick tip if you want to dress up your troupe or your students (or yourself) on a budget: get metallic printed lycra and cut out triangles to use as hip scarves. Works great on stage!
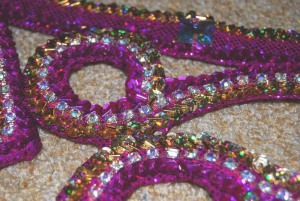
In addition to the fabric, I needed decoration. I found left over rhinestone chain in my stash from the Pink Turkish costume I made five years ago. Now seemed a good time to use it. I was a bit worried that I wouldn’t have enough but the project was done before I reached the end of the rhinestone chain.
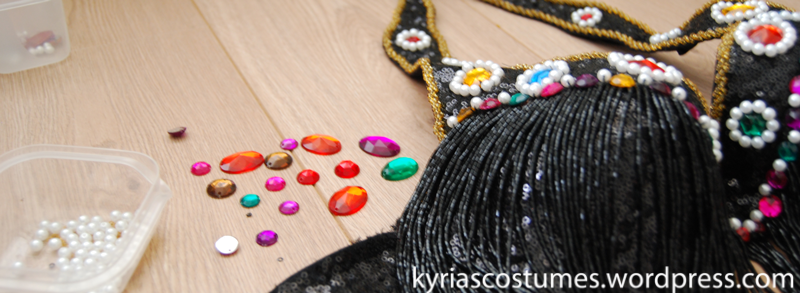
I wanted an accent color to create a contrast against the gold blackground and sparkly AB rhinestones. I bought glue-on rhinestones in Topaz, a bit of a brownish gold color. Having contrast is very important to create more depth and intricacy in the decoration. I bough 5 gross (5×144) of SS6 rhinestones and 1 gross of the bigger SS20 rhinestones. That wasn’t enough. I like my costumes to be heavily beaded so I purchased an extra gross of each to finish the job.
Close-up off beading on the Pink Turkish costume
I had a couple of smaller teardrop shaped rhinestone sew on stones in my stash and ordered some more. The big teardrop stones were also in my stash. I wanted to use them for the pink Turkish costume but never did. My recurring themes are planning on doing things and then not doing them, and buying too many rhinestones for my own good. Things could be worse.
The E600 glue was still in my sewing stash. I bought the glue for other craft projects *cough* making a mirror costume *cough* that didn’t happen…yet. Despite my hesitation to use glue on a belly dance costume I decided to go for it and see how it works. After all, it seems to work great for several big name designers and all those Russian dancers who make and sell costumes. It’s worth giving a try.
Cutting out the design
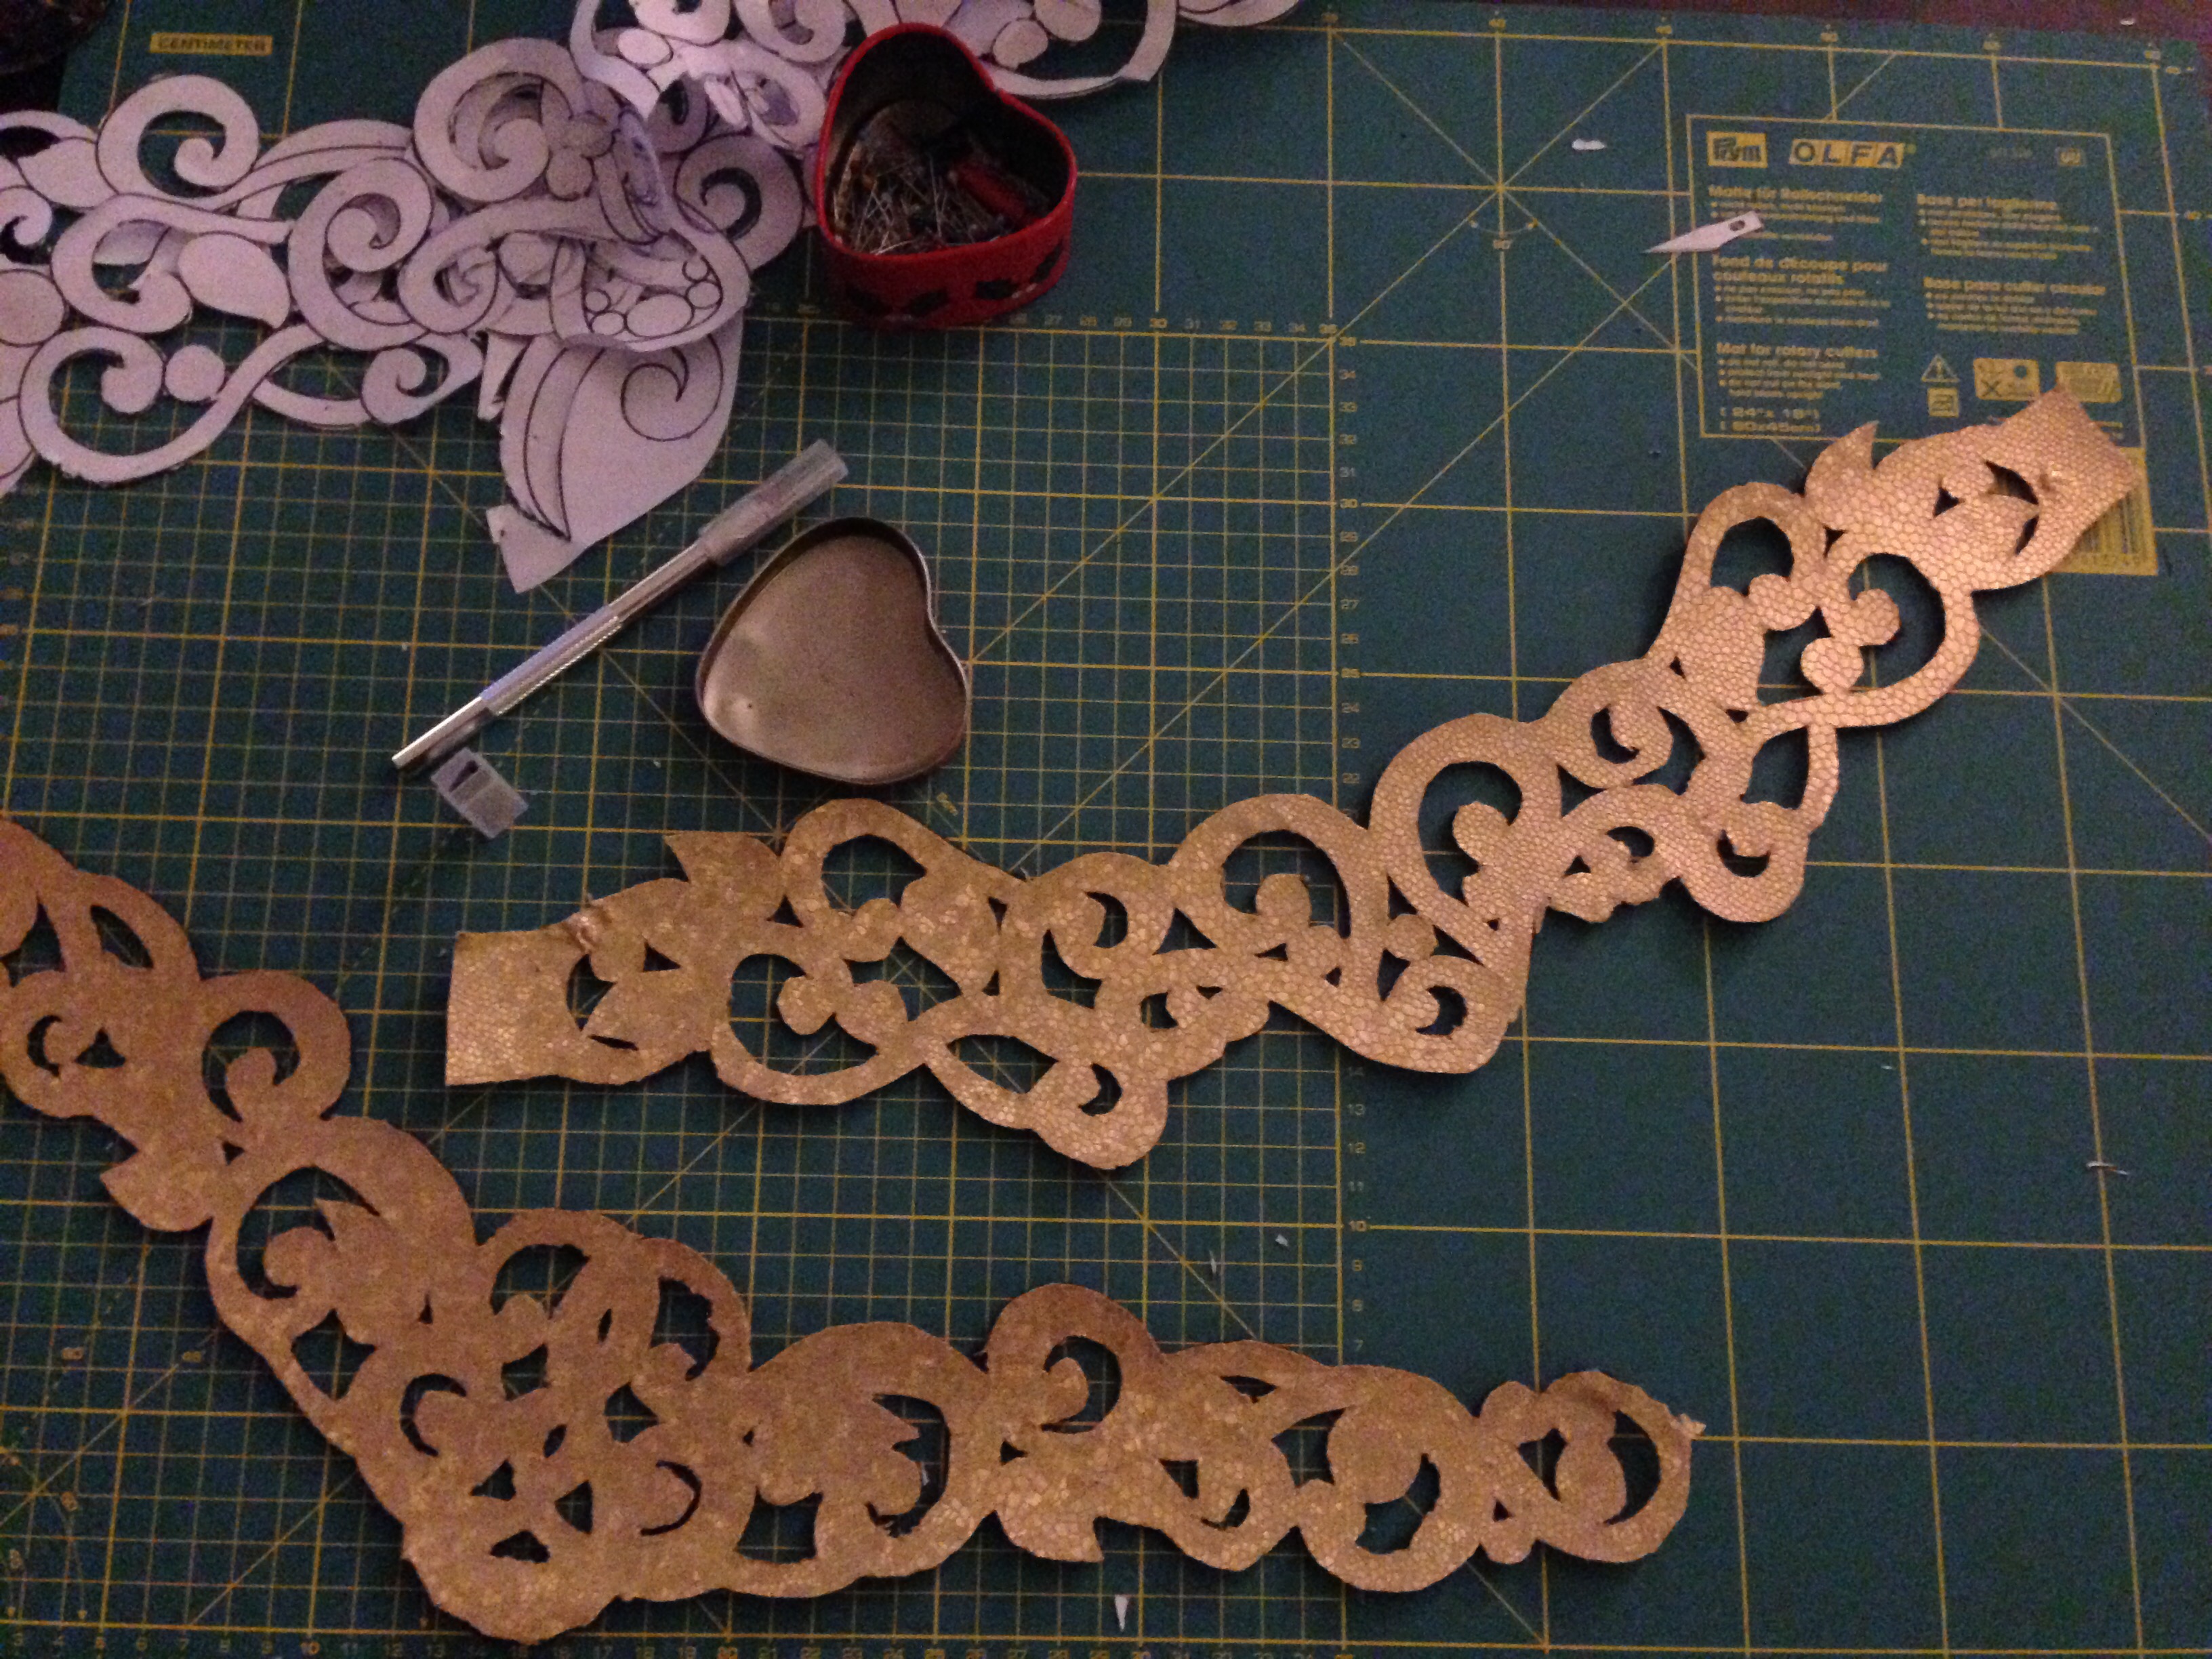
Admittedly I was in a time crunch that was really, really tight. I only had a couple of nights to finish this! It took more time than I anticipated but I still got it finished in the end. The first step was attaching the gold lycra to the belt base. That part went smoothly. Cutting the design out of the base material was a bit more daunting. The most important lesson that I learned is that scalpel knives are really sharp. It took me four hours to get to the point in the picture below. I also cut myself twice and had to stop because the cuts needed to heal.
Adding the rhinestones
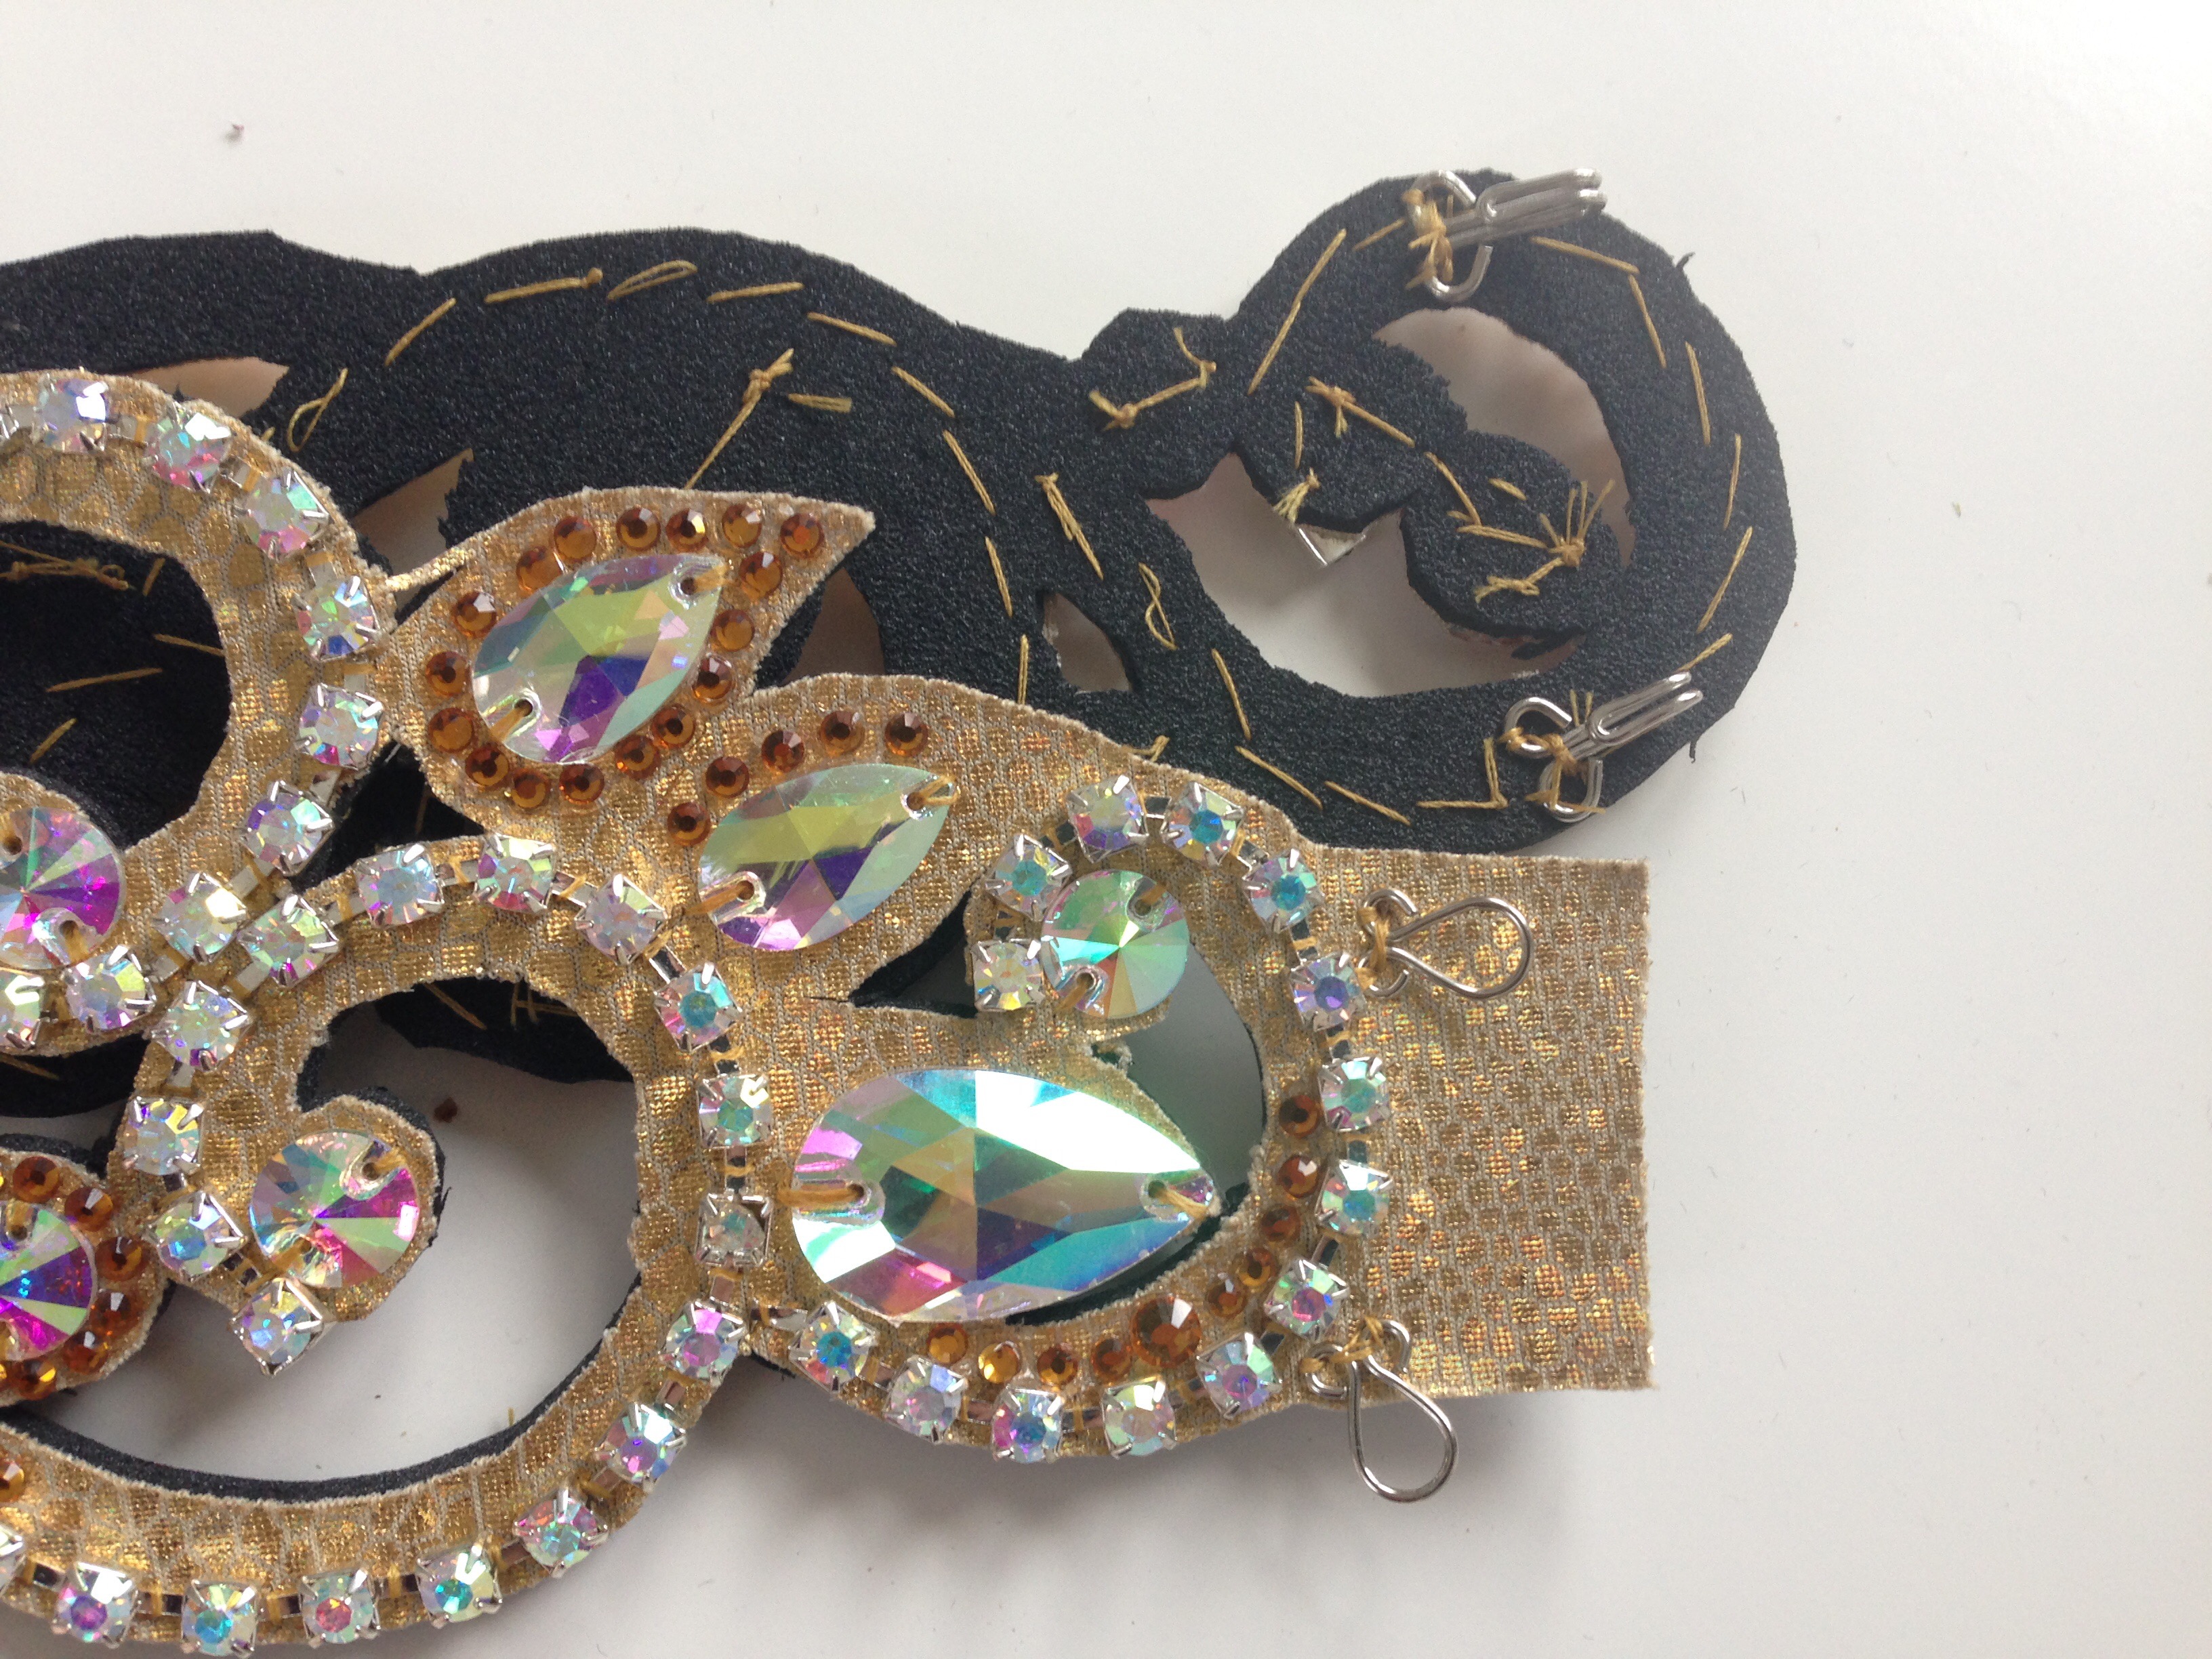
I was teaching a class the next night so I started with slightly healed fingers and the knowledge that I ddn’t have to cut out things with a scalpel knife for a while. Let the decorating begin! I started by sewing the rhinestone chain along the ouside of the curls. This would give the pattern some more definition.
Here’s a close up of the belt. You can see the stitches where I attached the rhinestones . The Topaz stones are glued on with E6000. As you can see, I did a botch job if you look close to the edges of the fabric. I cleaned it up a bit by cutting away excess fabric for a cleaner look. Suprisingly for the overall look of the costume this doesn’t matter. It looked stunning before I fixed the rough edges and stunning after.
I spent about five hours on adding the Topaz rhinestones to the belt by hand. It was a great time to ponder over some questions in my head. I also noticed that the fumes of the glue were unpleasant. Some googling revealed that E6000 fumes are highly toxic and should not be messed with. Read about the effects on a Burlesque costume maker on this page.
I am glad that I was costuming at night when our daughter was asleep. It would have been way worse if she had been in the room while I was using the glue. A note of caution for all costumers out there: E6000 works great for glueing rhinestones, but please, please take care of your health first. Wear protective gear while working with it, or choose an alternative that doesn’t contain tetrachloroethylene.
This is my work station. The small cup is there to hold the rhinestons. I covered the table with news papers to protect the surface. I used a sharp wooden stick to get the glue from the tube onto the costume in small dots. The glue isn’t runny, it’s sticky and almost gum like while it dries. I used the cotton tip to pick up a single rhinestone and put it on top of the blob of glue. Rinse, repeat. You can see the sparkle of the AB stones very well in all images.
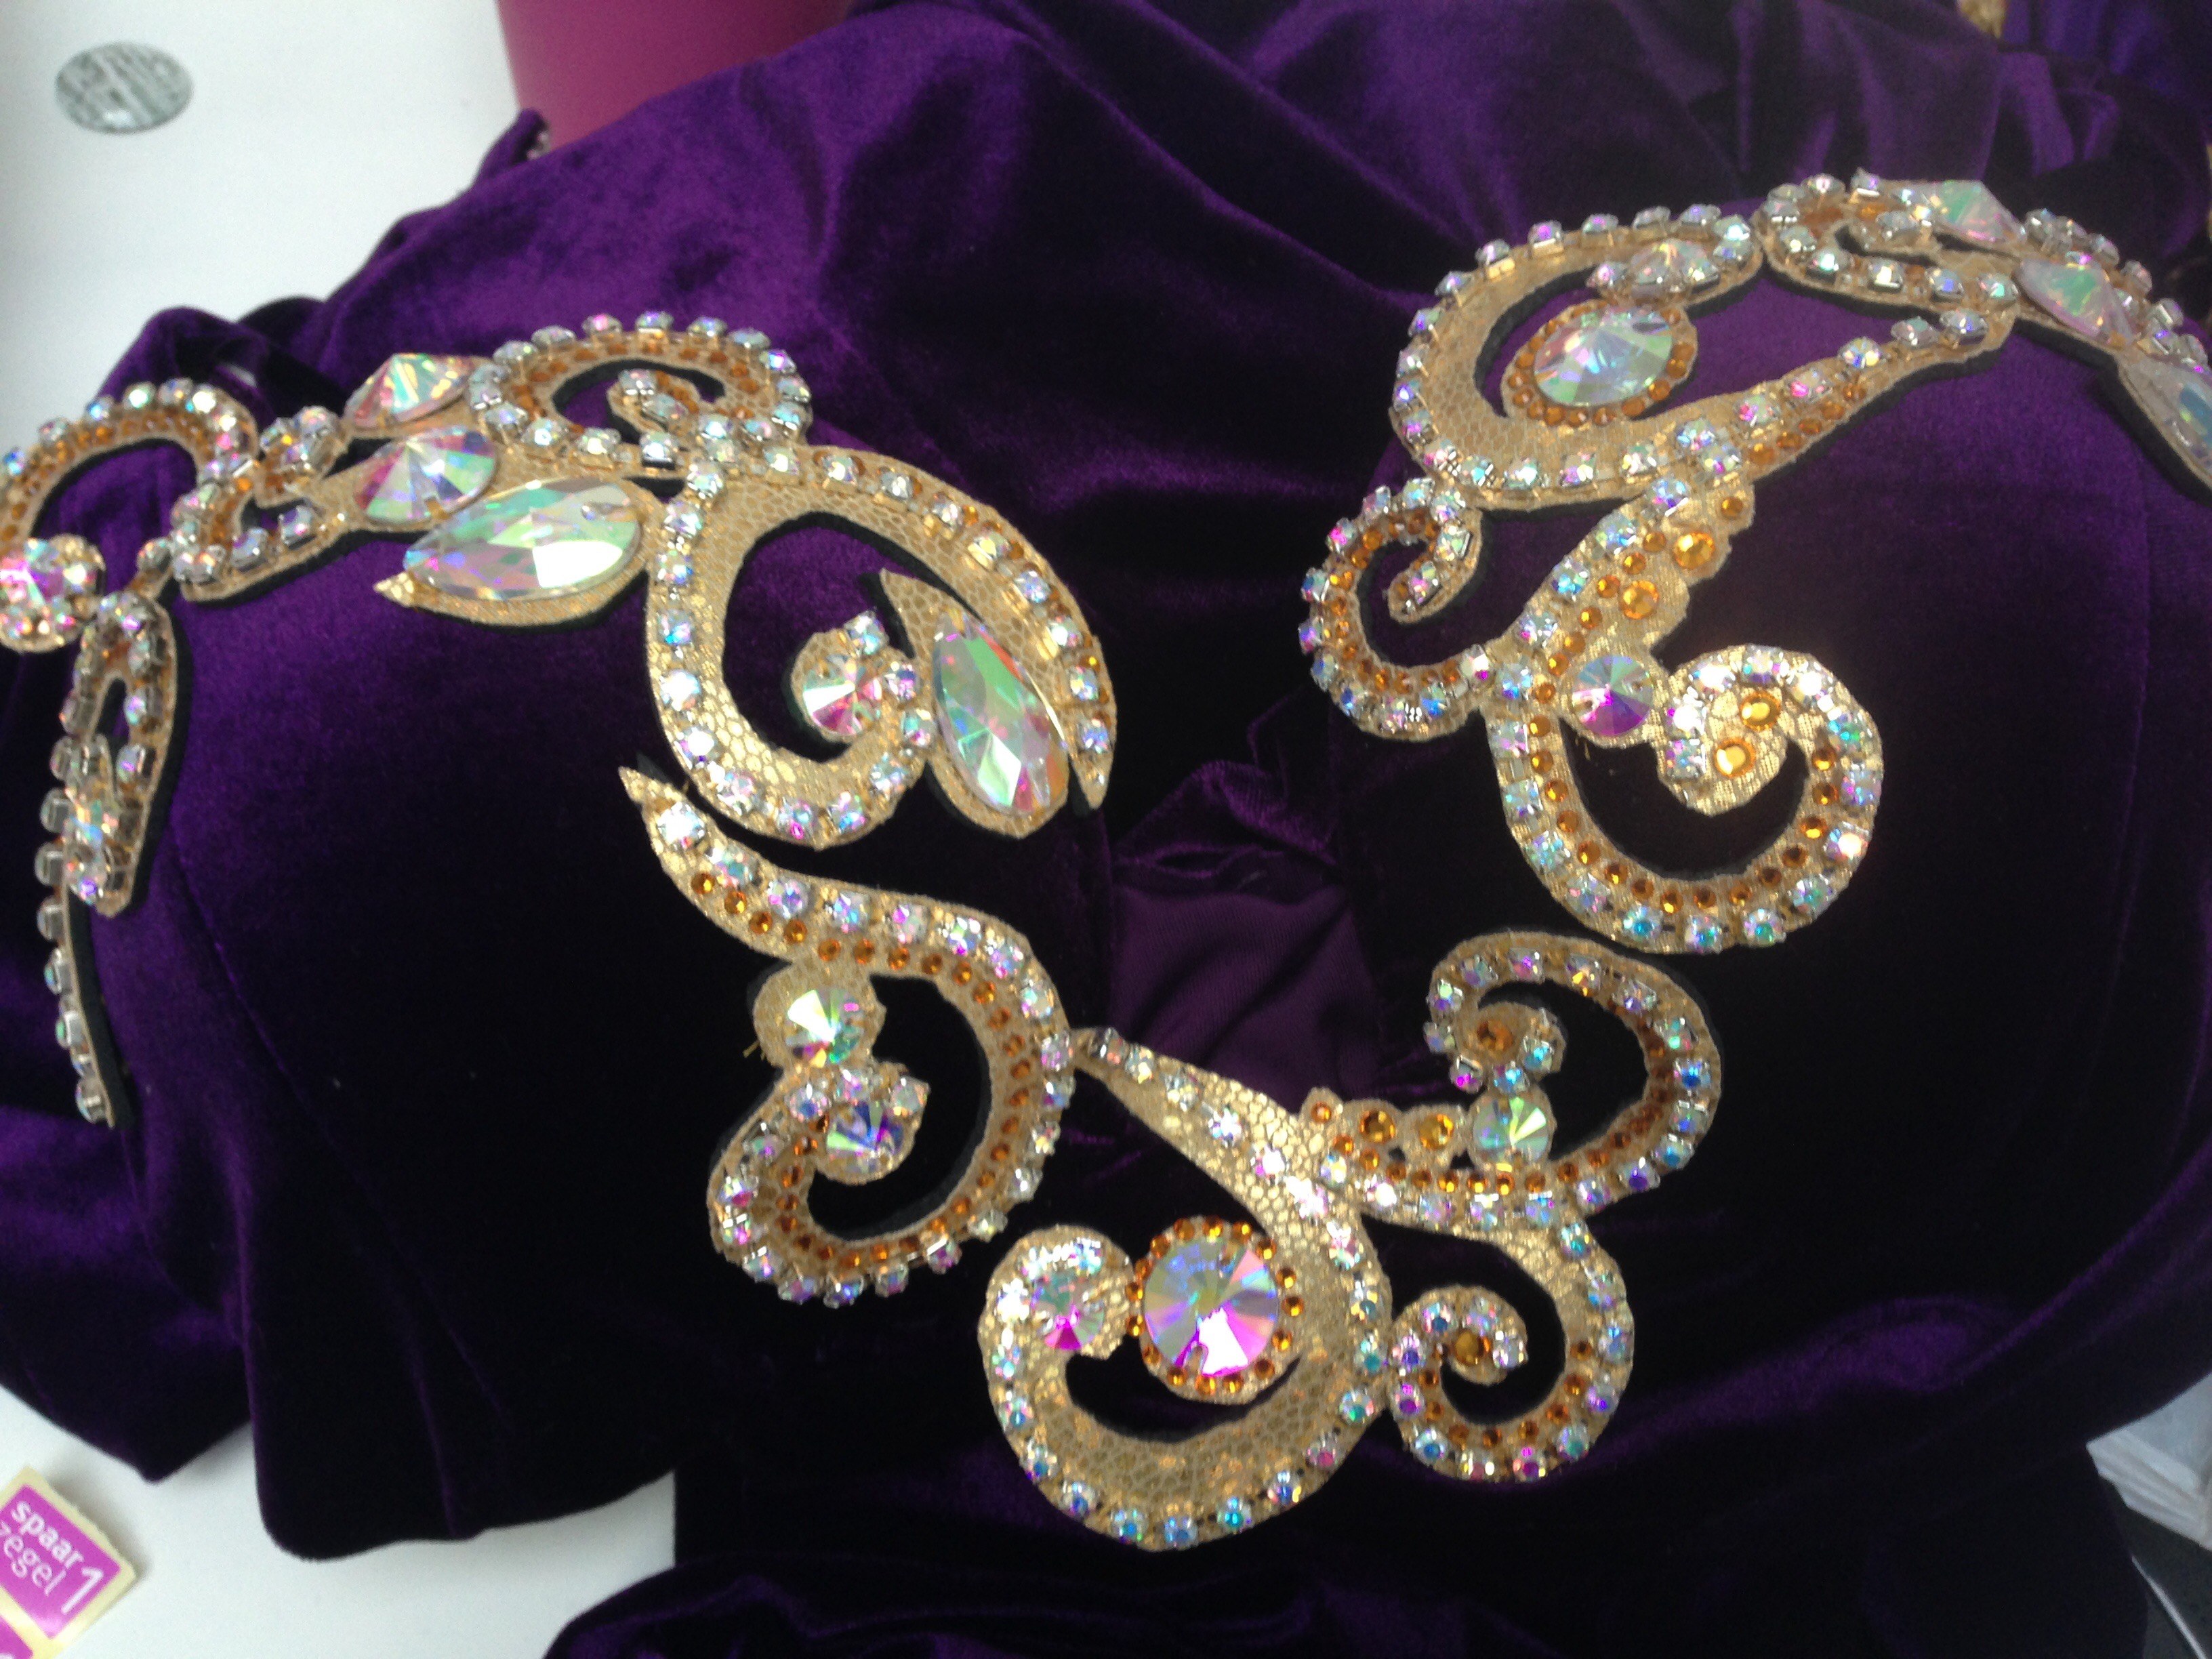
In the image below you can also see one of the smaller swirls that I made to decorate the bra. When I took this picture I was still adding rhinestones to the design, so the end result contains even more rhinestones.
And then I was done! It was a bit of an anit- climax as I didn’t have time to line so I considered it done when I glued the last stone on and sewed the hook and eyes in place so I could wear the belt. It turned out very pretty. I laid the loose swirls out on the bra and stitched them in place. For a sumptious Rococo look I let a couple of curls go over the edge of the bra to create a playful design. Here’s a close up of the bra with the swirls sewn on. As you can see, I ran out of rhinestones so the swirls on the bra are slightly less decorated. I’ll fix it once the next shipment of rhinestones comes in.
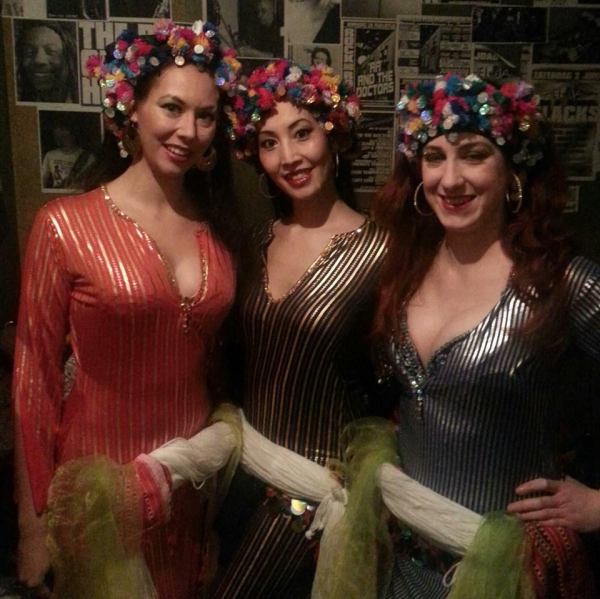
And this is what the costume looks like on the day of the photoshoot. This is a behind the scenes image taken with my cell phone. Excuse the poor quality, better images will follow once the photographer has time to process all the images from the shoot. I made matching opera gloves as accesoires to go with the dress. The tutorial for the gloves are on this page. The purple rhinestone necklace and clip on earrings were a souvenir from my visit to Miami in 2009.
It is comfortable, pretty and suits our theme of wearing purple and gold. Yay! I still have to work on this some more. I want to add extra rhinestones to the top and I have to line the belt and some of the appliquées. Maybe adding some ruffles to the lower part of the dress, as it could use a bit of drama on the bottom. Or maybe some sequins for extra sparkle. I am not sure yet. I happen to have a roll of holographic gold sequins in my stash that could work though.
What do you think? More ruffles? Leave it as it is? or do you have other ideas to make the dress even prettier? Let me know!
I am a professional bellydancer, costume-a-holic and dance studio owner living in the Netherlands. My biggest passion is teaching and performing bellydance and I intent to continue doing so for quite some time! I am a teacher at the online Belly Dance Business Academy, where you can find courses and workshops to help you grow your belly dance business. If you like to be kept in the loop, please like Kyria Bellydance on Facebook or follow me on Twitter. Leave your questions or comments in the box below, or let me know through Facebook.
Summer is great for all the projects that are lying around and need to be done. Often these projects don’t need much time or effort but somehow they just don’t happen. I decided to tackle my pile of unfinished projects one by one and my first project was a red beledi dress that I bought five years ago. It’s a troupe costume and each troupe member converted the sleeves to a different style.
The Dalla Dream Dancers backstage in our beledi dresses
I wore it as is, without finishing the edges of the sleeves or beading the sleeves. As a result, I always felt a bit uneasy when wearing the dress. Pulling it out of the pile I gathered my materials and got to work. It took me about three hours to finish the edges and now I can put it back in the closet, knowing that it will be ready for the next performance.
While working on the edge, I took some pictures so I could share this technique with you. It is a looped fringe with a big sequin in the middle, that adds sparkle to the edge, weight to the sleeve so it drapes better and a bit of extra movement.
Supplies
Seed beads
Cupped sequins (I recommend higher quality laser holographic sequins because they last a long time.)
Paillettes (I used holographic pailettes app 20 mm in diameter)
Thread (For durability, use extra strong thread)
Needle (as small as possible, to get through the seed beads)
Technique
Start by threading your needle and anchoring the thread to the fabric. Or, in different words: thread your needle and tie a knot in the thread. Choose your starting point and get your needle through the fabric from the back to the front, then to the back of the fabric again. Secure the end. Stick your needleback to the front and let’s get started on the beading!Add to your thread: one cupped sequin (make sure the cup sits with the bottom towards the fabric), fifteen seed beads, one pailette and then fifteen seed beads again. It looks like this:
Pick a point app 1″/2,5cm to the right of your starting point, and stick the needle through from the bottom of the fabric to the top. Tug lightly on the thread to tighten the beads and sequins.
I like to knot my beading as often as possible, so I make a knot at this point to secure the loop into place. If the beading breaks, I will only loose one loop of fringe, not a whole row.
Rinse, repeat.
Once the whole edge is finished, the effect is a shiny, beaded edge with a lovely dangling paillette in the center of each fringe. This technique is very forgiving so it looks rather uniform even when the distance between the starting point and the end point is more or less than 1″/2,5 cm.
I am a professional bellydancer, costume-a-holic and dance studio owner living in the Netherlands. My biggest passion is teaching and performing bellydance and I intent to continue doing so for quite some time! I am a teacher at the online Belly Dance Business Academy, where you can find courses and workshops to help you grow your belly dance business. If you like to be kept in the loop, please like Kyria Bellydance on Facebook or follow me on Twitter. Leave your questions or comments in the box below, or let me know through Facebook.
When people see me working on costumes the most heard comment is: ‘Doesn’t it take forever to finish a costume?’. My common answer is: ‘It does take quite some time’. I always wonder what the rationale is behind this question. Should I not start a project that requires a great deal of my time? Are they amazed that I am not getting bored by sewing thousands and thousands of sequins and beads to a costume? Or do they wonder how I have time to make costumes?
My secret to costume making is my daily commute. For my day job I travel roughly sixty five km by train. Living on the outskirts of a city means taking the local train, and the local train uses app. 50 minutes to get to my destination. That’s fifty minutes of sleep, listening to music, staring out of the window, checking facebook updates on my phone…. or fifty minutes of costuming. This is my regular view: the screen on the top tells me we are travelling at 112 kmph. The seats are color coordinated with the project I am currently working on.
At the end of the day when I am done with work, I have to take the same train back home. That’s another fifty minutes of costuming. The tricky bit is preparing workthat can be done in the train. For example, bringing a lot of supplies with me is out of the question. Bringing something with me that needs a lot of workspace is also a big no no. The tables are narrow and small and often I can’t get a seat at the window during rush hour.
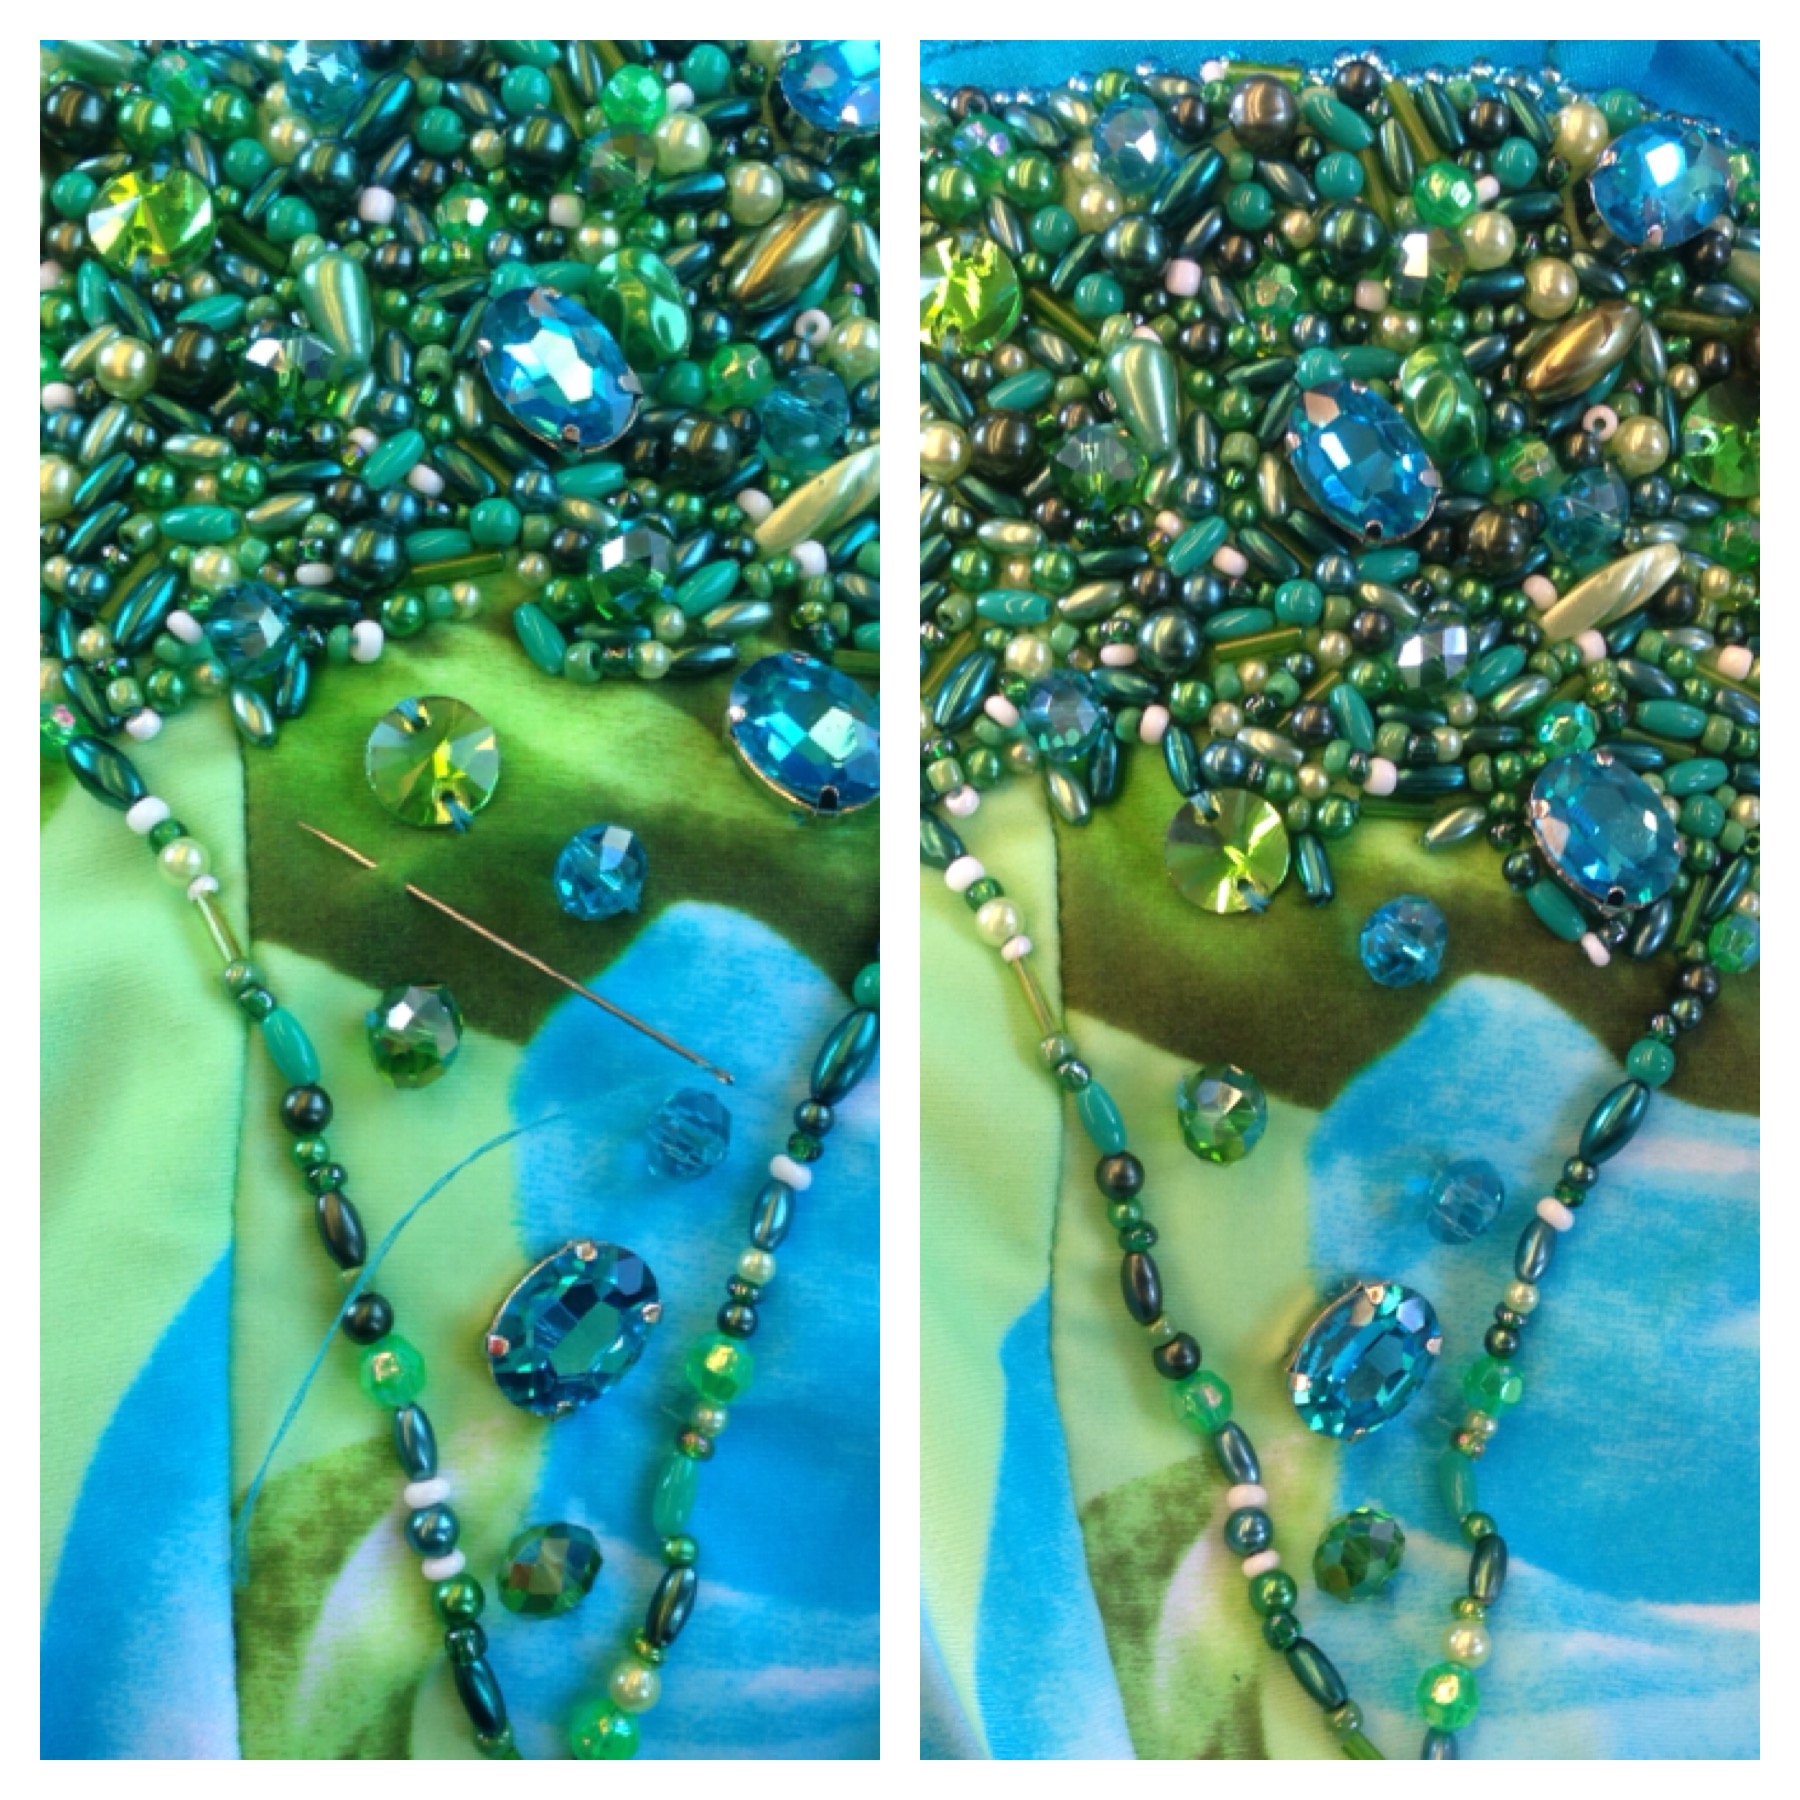
I learned to pack light, bring only the bare essentials for what I’m working on and to divide my work into chunks. For example, I am working on filling triangles with a random bead pattern. This is what I can get done in fifty minutes. For the record, this was the biggest triangle.
I am not putting pressure on myself to finish something in the limited time that I have. Instead, I focus on motivating myself to get started. If I don’t feel like beading, I simply don’t. But I know how happy I am when I finish a costume and get to wear it. Working on a costume is essential to getting closer of the shiny prize at the end of the proverbial tunnel. And there’s another pay off! Beading works like meditation for me. It’s totally zen to not stare at a screen, to limit my vision to the fabric before me and not do anything else. Sewing can be kind of therapeutic for the very same reasons. When others see a box of beads and a seemingly endless project, they get stressed out. When I see a box of beads, I think of how lovely it will be when it is done.
Another option is beading while watching the TV, something I used to do when I had more time on my hands. Something that requires little attention to follow the plotline is perfect. Nowadays I don’t watch much TV as it is. Too busy being home and running around after the little one, cooking dinner or being too tired to pick up a needle.
What are your time saving tricks to get some sewing or costuming done?
I am a professional bellydancer and costume-a-holic living in the Netherlands. My biggest passion is teaching and performing bellydance and I intent to continue for quite some time! If you enjoyed this post and like to be kept in the loop, please like Kyria Bellydance on Facebook or follow me on Twitter. Leave your questions or comments in the box below, or let me know through Facebook.
This is a basic beading technique I use often and I’ve seen it referred to with different names. Basically it is sewing sequins down in a row with the sequins partly overlapping, like roof tiles. The non stretch sequin trim looks quite similar to this technique and is much faster. I wouldn’t recommend edging the edge of a veil or skirt by hand as it would take up a lot of time. Machine stitching pre made sequin trim would be much faster and easier!
This technique is perfect for parts on a costume that need a bit extra, or where I want to hide something. Beaded fringe can be bought premade and it is attached to a cord on the top. The cord needs to be hidden after sewing it on, and an overlapping row of sequins is perfect for the job.
Getting started
I wanted to add some more fringe to the black multicolor bra and I had some old pieces of black fringe lying around. I hand stitched it on top of the cups. As you can see, without covering up the cord on top of the fringe is kind of ugly. I didn’t have enough to create a full row so I left a small gap in between the pieces. Due to the fringe swinging it is almost not noticeable.
The technique
Start by anchoring your thread to the fabric in whatever way you prefer. I like to work with a double thread and anchor by pulling the needle through the two threads in the back. I then take one sequin and sew it down by sewing through the fabric to the back.
Let the needle re emerge on the outside of the costume, right next to the first sequin. Add the next sequin and repeat.
Continue adding sequins until you reach the end of the rope, then add a couple more just to make sure the rope is well hidden. When finished, it looks like this:
One more thing to cross of my costuming to-do list! If you want to read more about this technique, I recommend Naima’s blog on fish scale beading. It shows some interesting ways of using this technique to create different textures in a costume.
I am a professional bellydancer and costume-a-holic living in the Netherlands. My biggest passion is teaching and performing bellydance and I intent to continue for quite some time! If you enjoyed this post and like to be kept in the loop, please like Kyria Bellydance on Facebook or follow me on Twitter. Leave your questions or comments in the box below, or let me know through Facebook.
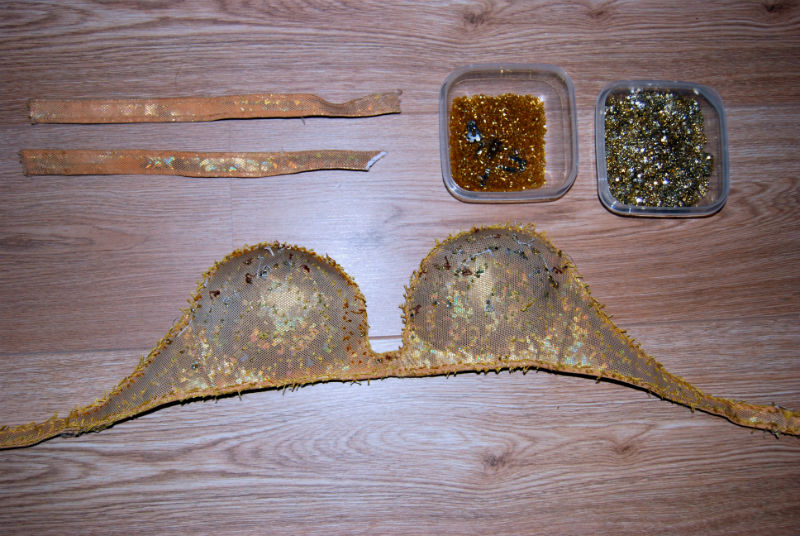
This is where I get to take everything apart! In order to reuse the mesh, I am deconstructing the bra and removing the beads and pieces of mesh. If the hook and eye closures are in good shape, I will reuse those too. The bra base doesn’t work for me so that one will be thrown out. The bra is edges in gold seed beads that are in good shape so I’ll reuse those too.
This is what I got to work with for the bra.
I’ve covered the Dina bra base with fabric. For the construction I chose to add side straps that are non-stretch so I can add mesh to the sides too. In addition to the non-stretch part, I’m adding elastic covered in fabric to the ends of the straps so the finished bra will be a bit more comfortable to wear and easy to resize while I get back into shape. I used the gold beads to edge the bra with a bit of beading, adding an extra bit of sparkle.
I am a professional bellydancer and costume-a-holic living in the Netherlands. I’ve been sewing and crafting stuff for over twenty years, for theaters, dance costumes, historic costumes and regular clothes.. If you enjoyed this post and like to kept in the loop, please like Kyria Bellydanceon Facebook or follow me on Twitter. Leave your questions or comments in the box below, or let me know through Facebook and I might write a blog post to answer your costuming question.
The belt is in this case the most intensive part of the costume project. Due to the size and the amount of decoration, hours needed to compete this part of the project will probably be over 15 hours. Not time to waste, so let’s get started! The previous belt was unlined, worn down and had damage to the pearls, acrylic jewels and the beaded fringe. Since there was so much damage to the original material, I needed to replace some of the materials and remake the costume. In this blogpost I wrote about the belt base so I am not starting from scratch 🙂 I started with rope beading the edges in gold seed beads. The original nelt didn’t have beading on the lower edge, but I quite like to see the shape of the belt and the rope beading brings a bit of attention to taht area of the costume. To make sure that the fringe was transfered to the right place, I put the base next to the vintage belt and marked the fringe placement with pins. After marking I removed the original acrylic jewels and placed them on the new belt.
Here;s a shot to give you an idea of what my workspace looks like. It is kind of chaotic because I like to have everything within an arms reach. The folded white tablecloth underneath the project is added so I could take pictures with a neat background during the proces. The belt however, is too big to be photographed against the white cloth so I resorted to taking pictures by laying it down on the floor. I can recommend working on a space with a background that contrasts with your costume to help you focus and concentrate on the project. Also, eye fatigue is a real thing and a good background that calms the eyes is helping to stay fresh.
Vintage belt and the new belt form side by side
I did both front and back of the belt in this manner. On the new belt I added more stones because I wanted more bling. At this point I was waiting for the mailman for the plastic 6mm pearls I ordered online a couple of nights ago.
New belts with acrylic jewels
While I was finishing up the belts, my husband came in with the mail and it included the pearls. Huzzah! I ordered from the Dutch website ‘Kralen.com’ and I recommend them, speady delivery and nice pricing. I ordered two packages of 250 pearls each and I was wondering if this would be enough. They didn’t have more of this type in the webshop so I decided to use this frst before ordering more.
White pearls from kralen.com
With the pearls, I edged the jewels one by one. The hardest part was to even out the pearls to create a neat frame for the jewel. I succeeded at most places and have a bit of an issue with a couple jewels where the pearls are not cooperating. You can see what I mean in the picture below. After edging all the jewels I started harvesting the beaded fringe from the vintage belt and pinning it to the new belt.
Pinning the fringe to the belt
This type of fringe is made in Egypt and consists of beaded frigne ties to a cord. the cord is easy to sew down, cut or rearrange on costumes. Working with this type of fringes is a huge advantage over handbeaded fringe, as handbeading fringe takes a lot of time. The fringe is not cheap (about 25 euro or 30 usd for a meter/yard) but totally worth it. Stitch the fringe to the costume by hand by going through the cord with needle and thread.
Sewing beaded fringe to the belt
Make sure to securely attatch the ends of the cord to the belt, as the fringe on the end might fall of when the cord starts to unravel. With a couple of extra stitches this is easily prevented. The good news was that all the short fringe from the belt as in excellent shape. The bad news was that the long fringe sewn to the bottom of the belt was in terrible condition in the back. I didn’t see it in it’s complete glory until I started to remove it from the vintage belt. The damage includes strands that have vanished, remnants of threads, half tied of strands and a bit of a jagged look where the fringe has thinned out. I had to double the fringe in a couple of places to create a fuller, healthy look.
Damaged beaded fringe
I came up short on the long fringes and decided to remove some of the fringe from the bra and put it on th ebelt instead. Yes, the bra that I completely beaded and lined a couple of weeks ago. Needless to say I wasn’t to happy about the prospect of demolishing my own work but it had to be done. With the extra fringe from the bra, I completed the belt. I’ll deal with the fringe shortage on the bra some other day. The belt turned out well, the black sequined base really helps to make the pearls and colored gems pop out.
New multi color belt front and back
Next week in part 7: lining the belt (I am so close to finishing this set, I can almost taste it!)
The black multicolor costume is well on it’s way. I made a new belt base, a bra base, I decorated the bra and lined it. Before continuing with the belt I needed a short project with a quick result. The key to keeping yourself motivated for complicated sewing projects is by cutting it into smaller chunks. Every time I finish a chunk, I remind myself how I am getting closer to the ultimate goal of creating a completely new costume.
So, I decided to work on the matching armbands. The original costume had arm bands made of stretchy sequin ribbon. For the remake I wanted something that mirrored the scallops on the belt and that showcased the bright jewels. I didn’t feel like taking the high road by carefully creating a paper pattern, instead I took a marker and drew the shape of the armbands on white felt and cut out two of the same shapes.
The outline of the armbands on white felt
I covered both shapes with black lycra by pinning the lycra into place and using the sewing machine to stitch it together.
The armbands covered in lycra
I then continued with ading the sequined fabric on top. Using a zig zag stitch to attach the fabric to the armbands, I then cut off the remaining sequined fabric. Watch me go crazy by taking this picture on the diagonal instead of horizontal.
Armbands covered in sequinned fabric
The beading is similar to the bra: I added rope beading along the edges and stitched jewels edged in pearl in the center of the bands. I left the ends of the armbands unbeaded on purpose, to make it easier to attach black elastic. I cut out two pieces of lining big enough to line the arm bands.
Armband on a piece of lining material
In order for the fabric to follow the scallops, I needed to make a couple of cuts to create ease in the lining fabric. I made cuts at the places where the fabric might be tense, where the design dents inward.
Small cuts to allow for ease
I pinned the lining to the armband with a couple of pins in the center, then started pinning and folding the lining to make it follow the scalloped edges of the design. I started out in the center and worked outwards. As you can see, I am still pinning constently from the outside inward. Consistency in the work proces helps to create consitent quality in the finished product. In other words: once you find out what works for you to create a high quality costume, make sure to stick with it every step of the way.
Manipulating the lining to follow the scallops
Once pinned, you can already see what the end result will look like.
Lining completely pinned to the arm band
With sewing the lining down, I left the side parts open, leaving a gap for the black elastic. In essence this is not neccesary, the elastic could just as easily be sewn on top of the lining and the arm band would have been fine. I made this choice because I like the look where the edges of the elastic are hidden behind the lining. Here I am poking the hole with a pen to show you what it looks like, as black on black was hard to photograph :-).
The gap left open for elastic
All I needed to do was find a piece of black elastic, shove it between the lining on both side and pin it. I tried it on for size and adjusted the elastic accordingly before stitching it into place.
Elastic pinned to the arm band
Finished arm bands
Weehee! I am happy with finishing these and I am continuing with the belt.
With a shiny new bra base ready to be decorated, it was time to salvage what I could from the original bra. As I suspected, all pearls had to be thrown out because the paint was peeling off the beads. The beaded fringe was in okay shape, here and there a couple of strands had given up and the fringe was a bit loose on the thread with a bit of wiggle room between beads.
The gold seed beads were used to bead the shoulder straps and the top edge of the bra but I wanted to bead the whole edge. When I ran out I ordered 3mm gold seed beads from a Dutch website. She was quick with her response and shipping. The beads came in the next day and I was ready to continue. I used a regular rope beading technique, with five beads per stitch. This went insanely fast with 3mm seed beads: I rope beaded the whole edge in two hours. Another reason for using the bigger type of seed beads is that the holes are bigger, making it easier to get your needle through. If given a choice, always go for the bigger seed beads!
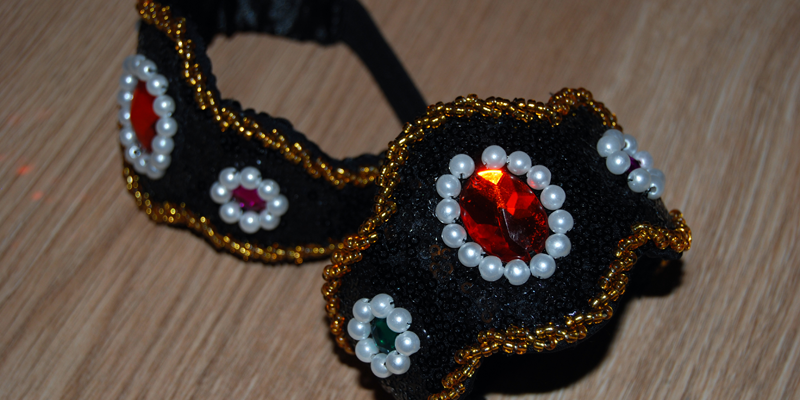
After finishing the rope beading I transfered the acrylic jewels and lined them with new pearls I had lying around. It was already looking rather fetching, if I say so myself. In order to get the pearls neatly around the gems, I stitched them on working from the outside to the inside of the gem, allowing the pearls a bit of room to ‘settle’.
The new bra with the beadwork
I stitched the beaded fringe into place and covered the seam with smaller acrylic jewels and pearls. I am not sure if I want to keep the fringe at this length, or create more of a V-shape by shortening the outside strands on the cup. I will decide later, for now I wanted to finish the bra so I can wear the costume.
The new bra on top, the vintage bra below
Close-up of the beadwork
To make sure that it fitted, I added the hook and eye closure to the sidestraps and pinned the halterstraps together. I have a bit of room for padding, otherwise it fits perfectly. Remember when I wrote about the sequinned fabric not covering the edges? It works, no itching sequins on my skin!
Beading the multi-color bra
Stay tuned for part 4, where I am adding the lining to the bra 🙂


 At the end of the day when I am done with work, I have to take the same train back home. That’s another fifty minutes of costuming. The tricky bit is preparing workthat can be done in the train. For example, bringing a lot of supplies with me is out of the question. Bringing something with me that needs a lot of workspace is also a big no no. The tables are narrow and small and often I can’t get a seat at the window during rush hour.