How to make a belly dance fusion hipscarf with ruffled trim

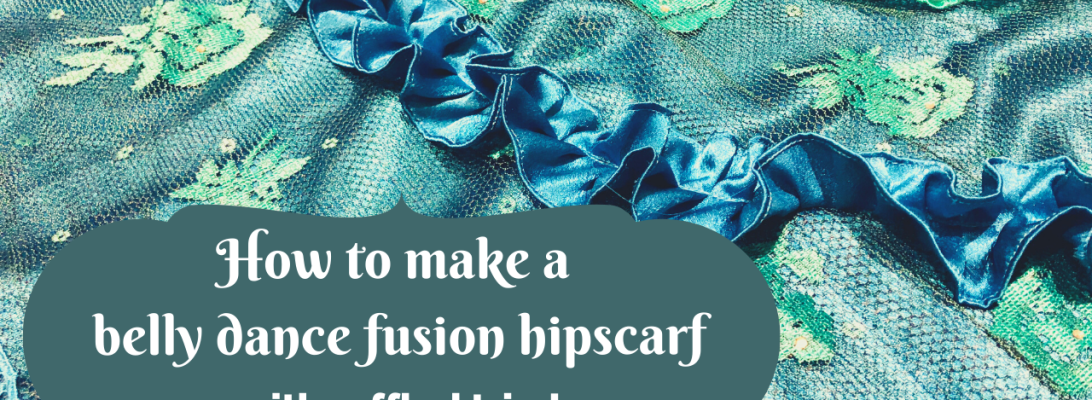
Like everyone else I am uncluttering. In my stash I found fabric and trim remnants from fusion hipscarves from a student recital. I am in need of silent hipscarves for teaching and I need bright colors that show up well on video. And while I’m sewing I might as well create a post so you can create one too! There are a couple of neat tricks in this post, including how to finish edges and how to create ruffles. Let’s get started!

Materials

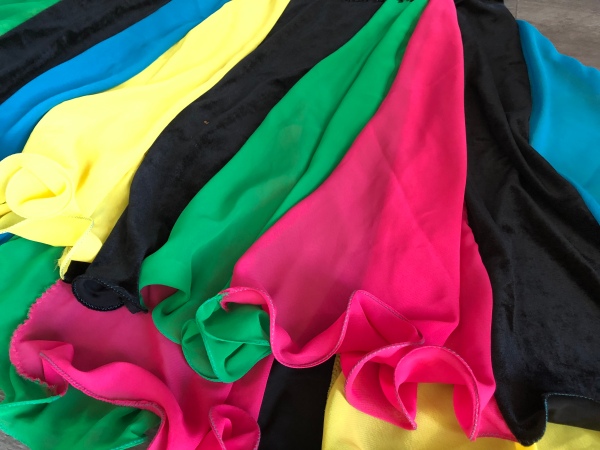
  • Fabric for the base (app. 50 x 110 cm)
  • Satin ribbon for the ties: 250 cm long, 5 cm wide
  • For the ruffle: woven fabric, app. 20 x150 cm
  • Various lace trim (app. 2 meters for the lowest trim and 1.5 m for the upper trim)
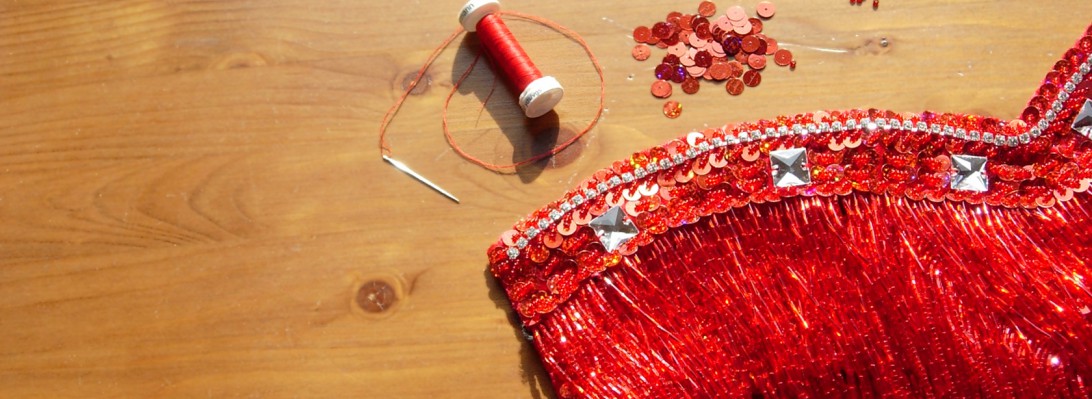
  • matching and contrasting thread

This project can be done by hand but I recommend using a sewing machine.

Step 1: The base

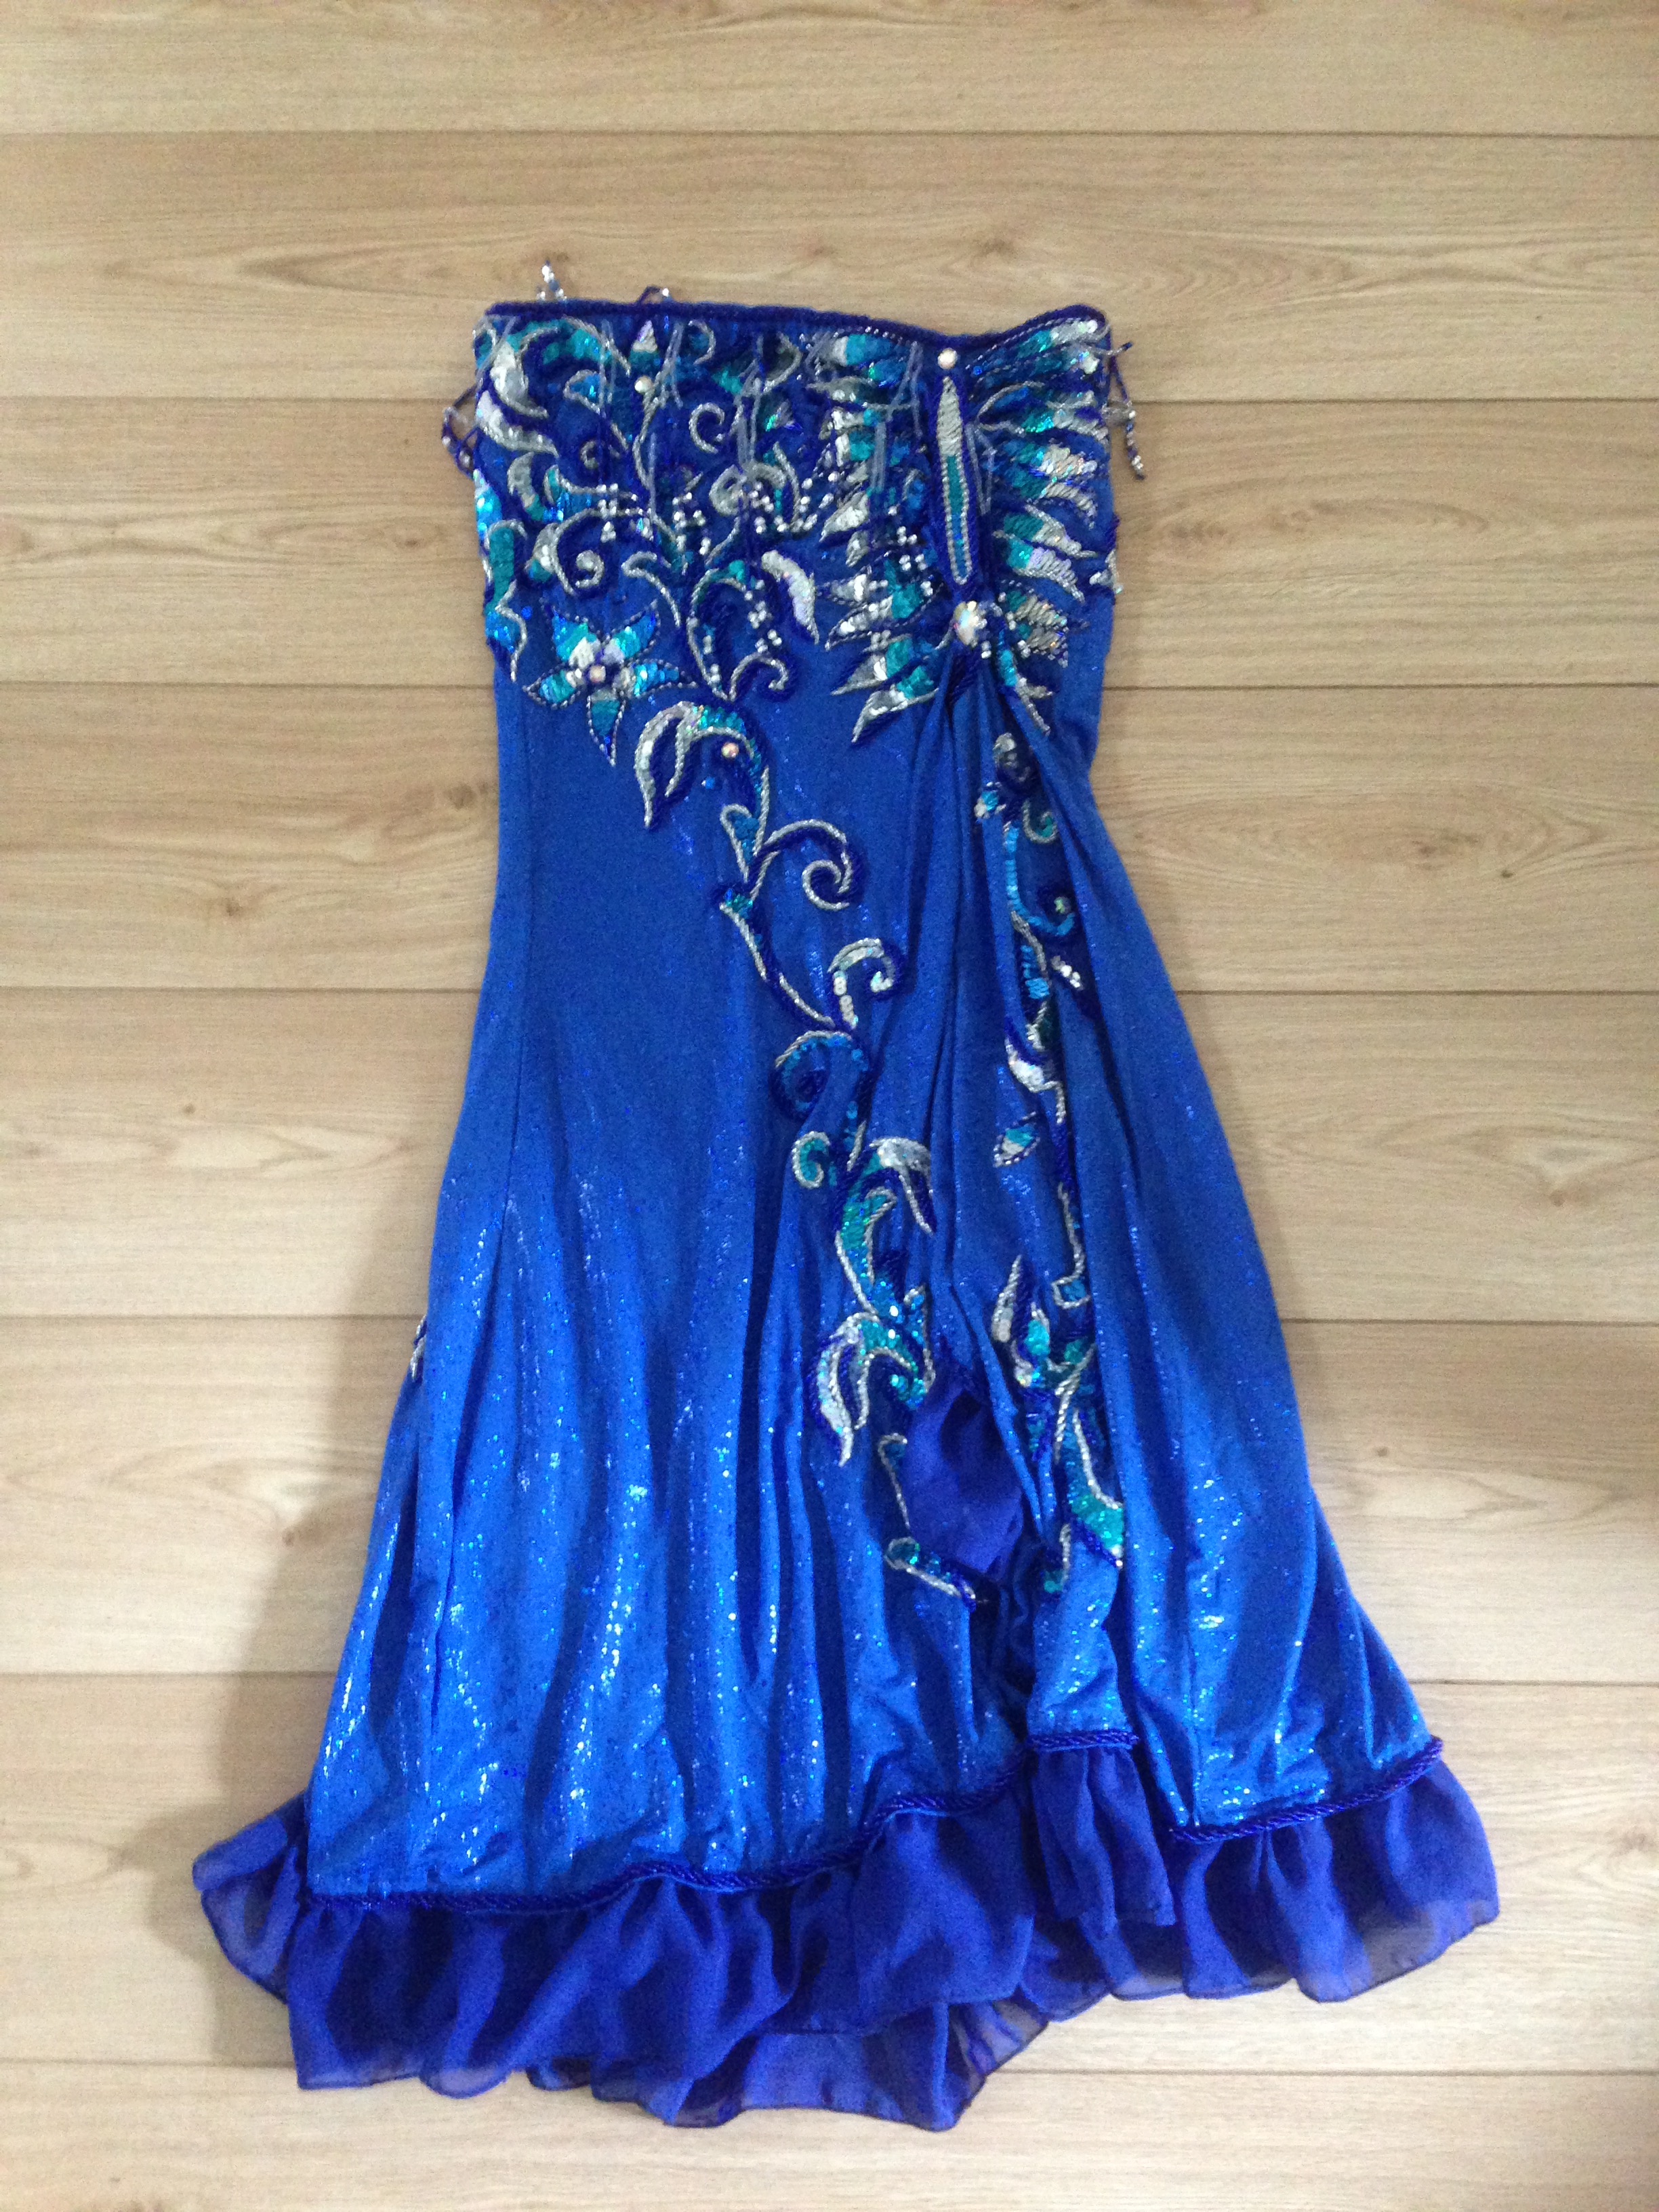
In this case I layered a lace fabric on top of a blue satin fabric. Securing the layers in place with pins, I used a straight stitch and a zigzag stitch to sew them together. Make sure to pin while laying flat. Fold the ribbon in half and mark the center with a pin. Mark the center of your hipscarf and match the pins. Stitch the two together. Due to the double layers and the satin being slippery it was hard to keep everything straight, so pin like your life depends on it!

View of the seams on the back, showing the the finished hem on the left and the unfinished hem on the right

Step 2: Making ruffled trim

Here’s a secret I learned from making historic costumes. Victorian costumes have a lot of lace and trim, and it usually covers quite a large area. The sleeves, the hems, the skirt, there’s trim everywhere. Buying trim is very expensive, and it was common to create various types of decorative trim from fabric. And that’s what I did for the ruffled trim.

Victorian fantail skirt
This is me going all Gothic with a Victorian fantail skirt with tons of trim. Maybe 2005? Good times.

Take your base fabric, a woven satin fabric in this case. Use a simple household item to measure out the width. Or use a tape measure, but this was faster. In this case I used a spool of thread. Cut about 10 cm into the fabric, then grab the fabric on both sides of the cut and tear the strip over the whole width of the fabric. Repeat if necessary. In this example, I used about twice the length of the finished trim. In this case that were three strips of 150 cm for a total of 450 cm. Attach all the strips by stitching them together to make one long strip of fabric.

Example of a torn strip on the left, and how to measure the width with a spool on the right

The torn edges of the strips will eventually start to fray. I used a narrow rolled hem on both sides to finish the edges. A rolled hem foot is highly recommended to make this easier.

Close up of the rolled hem on the fabric strips. It looks like ribbon now!

Ruffle the hem by stitching with low tension in the center of the fabric an pulling the thread. Or buy a super fancy gather foot for sewing machine and go crazy. Guess which option I choose 😉

Example of trim ruffled by the sewing machine. This picture is for display purpose only, obviously the fabric goes in ungathered when sewing

And now you have a beautiful length of ruffled trim, ready to use.

Step 3: adding the trim to the hipscarf

I used lace trim on the outer edge because I liked how it added an interesting shape to the edge of the hipscarf. Sewing the trim on the round edge is a bit of a challenge. I sewed slow and made a lot of adjustments while sewing by using my hands to keep the trim in the right place.

I then pinned the ruffled trim into place, checked the location and sewed it to the hipscarf. Make sure you set your thread tension back to normal if you lowered it in the previous step to gather the trim. I decided to use a little bit of lace trim on the top for a third tier as well. It’s a nice contrast with the fabric plus it adds depth.

The finished hip scarf with three rows of trim. I absolutely adore the colors and textures.

I am undecided on how to proceed, as it would look lovely with a bit of extra bling like rhinestones on the lace, or sequins in the center of the ruffled trim. I’ll leave that decision for another day. I’m going to wear it in the next class and post pictures afterwards.

Got questions or want to see more in progress pictures? Friend me on Instagram or Facebook!

I am a professional bellydancer, costume-a-holic and dance studio owner living in the Netherlands. My passion is teaching and performing bellydance and I’ve been doing that for almost two decades. I am a teacher at the online Belly Dance Business Academy, where you can find courses and workshops to help you grow your belly dance business. If you like to be kept in the loop, please like Kyria Bellydance on Facebook , follow me on Twitter or find me on Instagram. 

Black velvet dress with multi color godets

The back and multi color costume was a refurbish project in 2015. Multi color means that there are a lot of skirt options and I wore this costume with purple, yellow or pink circle skirt. But it would look really awesome with a matching black and multi color skirt! Off I went to the online fabric store, ordering black stretch velvet and chiffon in four bright colors. The fabric arrived, I put it in my closet and waited two years to give the fabric time to mature. I’m kidding, I have more ideas and plans than I have time so that’s why it took me so long to get started.

The pattern

Pattern straight skirt with godets

I choose the easiest way: by starting with a rectangle as a basic skirt and adding slashes for the godets. That worked like a charm! I originally intended to make eight slashes but I ended up with seven. The side where the skirt closes functions as the seventh slash.

My idea was to use two types of fabric for each godet, allowing the skirt to show different colors while dancing. I got that idea from watching a dancer in a Bella costume that had multi colored godets. After cutting quarter circles out of chiffon, I picked the color combinations (green with pink and blue with yellow) and attached the matching quarter circles together.

The job of adding the inserts was faster and easier than I expected. I put the insert on the fabric with the outside parts of the fabric together and start sewing from the top of the slash, down to the bottom. Repeat for the other side, always staring at the top of the slash and sewing towards the hem. Why? because some pieces turned out longer and some shorter. The last godet was added by putting the sides of the skirt together and closing the seam, turning it into a large tube with chiffon inserts.

The top and the bottom

While I was planning on making a skirt, I knew that wanted to cover my belly for this costume. Instead of measuring the skirt from my hips down to the floor, I measured from below the bust line down to the floor so it would go all the way up to my bra. To perfect the fit, I put it on inside out and used pins to indicate where the skirt would need to be tighter (around the waist) or wider (around the hips. I then took the skirt off and sewed along the pins.

img_0909
The skirt/dress laid out on the floor

The top has a tunnel of 2 cm wide elastic, plus I added a loop of black elastic that starts from the side below the bust, goes around the neck and then down to the other side. Snaps were sewn on the edge in six places to attach to the bra.

Hemming this skirt was done by putting the skirt on a clothing dry rack, measuring the appropriate length and cutting it while hanging. I added fishing line to the hem afterwards so I knew that it didn’t have to be very exact. Look at that pretty fluffy hemline!

img_0912
All the ruffles!

The finished look

This skirt needs to be spinning to see it’s full effect and this is the best shot I have so far. It’s very comfortable and I am happy with the result. My plan is to make a matching top as well, in case I want to go for a more covered look but I am putting those plans on the back burner right now. Maybe wait another two years before I get started on the top 😉

Blackmulticolor 02
Spinning around in the studio

I am a professional bellydancer, costume-a-holic and dance studio owner living in the Netherlands. My passion is teaching and performing bellydance and I’ve been doing that for almost two decades. I am a teacher at the online Belly Dance Business Academy, where you can find courses and workshops to help you grow your belly dance business. If you like to be kept in the loop, please like Kyria Bellydance on Facebook , follow me on Twitter or find me on Instagram. 

Lengthening a skirt

Living in the country of some of the tallest people in the world means that I am used to being fairly average in length. I am 176 cm tall, which is three inches short of being six feet tall. Or, as google informed me:

length according to google.png

After buying several second hand costumes through the internet, I noticed that I am roughly 10 cm/4 inches taller compared to most dancers. How do I notice? Because most of the time, the skirt is too short. I hate short skirts, because it breaks the body line and it looks like I’ve outgrown my costume lengthwise. One of the reasons for me to start making my own clothes was because it was nearly impossible to find pants that were long enough.

A while back I bought a gorgeous second hand costume that I suspect is a Hannan. No label though, so I can’t be sure. The beadwork is superb, very pretty with holographic sequins and seed beads. And it also happens to be too short. Hm. I’ve worn this costume before but it never quite felt right. This summer I am overhauling my costume stash and fixing all the things that need to be fixed and this costume was high on my list.

As an extra challenge, I try to use the materials I already own, as my stash is overflowing. In May I turned two blue chiffon veils into a circle skirt. I needed a blue circle skirt for my student recital and the fabric was a bit too heavy for intensive veil work anyway. The left over scraps were turned into one long piece of fabric, app. 12,5 cm/5 inches wide. I didn’t measure the length but it was slightly longer than the edge of the skirt.

IMG_4845

I finished all edges of the fabric strip, then used a long, loose stitch along the top edge of the strip. Pinning the beginning and the end, I started gathering the ruffle and pinning it onto the hem of the skirt. It took a while to get the fabric evenly distributed but it worked. I used my sewing machine to secure the strip to the skirt and I need to hand baste the edge to finish the seam neatly.

IMG_4846

I am a professional bellydancer and costume-a-holic living in the Netherlands. My biggest passion is teaching and performing bellydance and I intent to continue for quite some time! If you enjoyed this post and like to be kept in the loop, please like Kyria Bellydance on Facebook or follow me on Twitter. Leave your questions or comments in the box below, or let me know through Facebook.

Minty fresh costume part 5: The costume in action

I started blogging about the Minty Fresh costume in January 2014. An updated drawing of the design was added in April 2015. I sort of finished the costume and wore it for a performance in August 2015 when I was halfway through my pregnancy and it has been quiet ever since. But that doesn’t mean nothing happened!

This year I am really big on drum solo’s, probably because I’m working on a lot of dance technique things and drum solo’s are great for using and practising isolations. The end of the year recital from Roos Belinfante came up and I wanted to wear something nice and summery. Then I remembered the minty fresh costume, that luckily has elastic side straps on the bra and an elastic waist band. It saves a lot of time as it needs less adjusting.

In the Original design, I planned on adding beading all around the skirt. Well, that didn’t happen. I’m adding it to my to-do list for this summer, it would be nice to completely finish this costume before moving on to the next project. For extra movement I added beaded swags by buying two long necklaces and pinning them to the skirt. Yes, it is that easy.

Look at my swagger!


The drum solo went over well I think. It’s a an improvisation based on a choreography so some things are planned and some things are not. Overall I liked how relaxed the afternoon was and I immensly enjoyed all the performances by both students and my dance friends. Here’s the video of the drum solo so you can see the costume in action. Have a great summer and see you soon!

I am a professional bellydancer and costume-a-holic living in the Netherlands. If you enjoyed this post and like to be kept in the loop, please like Kyria Bellydance on Facebook or follow me on Twitter. Leave your questions or comments in the box below, or let me know through Facebook.


Minty fresh costume part 2: the skirt

Costume sketch for blue/green costume

A couple of months ago I started working on a blue/green costume. I covered a Dina bra base, rope beaded the edges and covered the strap. Then life happened: I was the producer/teacher/stage manager/sound engineer for the ‘Arabian Nights’ shows in December, that certainly was a lot of fun. During Christmas I had a personal matter that asked for all of my attention and after New Year I needed to work on promotimg and teaching my weekly classes.

All very valid reasons why I didn’t continue working on the minty fresh costume. What also didn’t help is that I cut into one of the backpanels of the skirt by accident and I don’t have more of the blue fabric. The skirt design needed to be completely redone to make up for that mistake.

Below is the drawing of my original design plu

Costume sketch for blue/green costume
Costume sketch for the minty fresh costume. A close up of the bra is in the upper left corner

s the updated design. As you can see, there’s a bit of an hourglass line going on in the skirt that should work wonders.

I find it hard to continue and finish costume projects that are put on hold for some time. A good example is the green velvet costume that I started in 2007 and finished in 2011. An even better example is my to-do box that contains costumes that I will probably never finish. But! Finishing a project is very important for my state of mind. Unfinished projects are like skelletons in my closet, they are in the back of my head taking up space that I rather use for new projects.

with that in mind, I cut the new patter pieces and made the matching skirt. Sure, it isn’t a complete costume yet, but all it needs is some chunky beading and a bit of fringe to take it to the next level. And with that in mind, I am putting it back into the to-do box.

I dare you to post about one of your unfinnished products on your blog or facebook. Tag me and we can act as an ‘unfinished project support team’ for each other.


How to cover straps with no visible seam

I am still working on the minty fresh costume, albeit slowely. I recently covered the shoulder straps for the bra. As I don’t want to add beading to the bra straps, I wanted no visible stitches on the outside of the straps. Usually I cover straps by wrapping them in the desired fabric, then stitching along the sides of the strap.

This time I used lycra, which made it easier. I first created a tube that fits perfectly around the original bra strap. Turn the tube inside out by using a big safetypin, push the pin through the center to flip it inside out.

IMG_2046[1]I then used the safetypin to pull the white strap through the blue casing. It took a bit of wiggling aorund to get this right but it worked.

IMG_2048[1]I then smoothed the outer casing until the seam was neatly on the inside of the strap and there were no more wrinkles. I then used a straight stitch to keep the casing in place: one time straight acros the bottom (with a piece of white still visible). On the top, I folded the top edge of the casing over the edge and stitched it in place. Left is an exmaple of the bottom that will be attached to the bra and hidden by the lining of the bra. On the right is the example of what the top of the strap looks like.

IMG_2050[1]

Haven’t had tme to actually attach these to the bra, but I will get there soon! A bit of a bummer was that I cut up one of my skirt pieces by accident to make the casing for the straps and I now have to rethink my skirt design. More about that later.

Minty fresh costume part 1: the bra

I posted a couple of pictures on buz and facebook but I felt nostalgic and want to write more about the proces on LJ. Hi, my name is Kyria and I’m a costuming addict. It’s been almost a year since my last costuming project. And the last projects didn’t count, as they were small repairs like lining a coin bra and fixing a beaded applique. I made a red satin dress for a bellydance-burlesque performance  in december 2013 but that wasn’t really bellydance.

Time for a new costume! I did a fabric swap with Bea a while back. She sent me the remnants of turquoize lycra that she used for beledi dresses. I sent her red lycra I think, can’t remember exactly. Bea included the leftover beads and I neatly put all of this away in my fabric stash. That must have been two years ago. about a year ago I bought two Dina style bra bases through facebook (can’t remember the seller) and once again, put it neatly in my stash. Now that I am rekindling my activity in the dance community I want to wear something new and I am starting with this.

First time working with this type of bra base. Observations: it holds it shape very well yet is easy to penetrate with a needle (something I worried about). I give it a thumbs up and intend to buy more bra bases. I took the bra straps off to cover the base. The straps are very basic. I’ll keep the neck straps but I’m not sure about the ribcage straps. They are made of covered elastic and after two years, they are probably losing elasticity. It would be a shame if the straps would not give sufficient support once I am finished.

The second epiphany was that Bea sent me large seed beads with large holes. This is awesome. I’ve worked with Gutermann seed beads before and even the larger beads have TINY holes, causing needles to get stuck and such. Big seed beads means that rope beading the edge takes less time, one more reason to break out a bottle of red wine and celebrate. The contrast fabric is printed lycra from my local fabric market. I got a lot of this with the idea that it could be used for troupe costuming which I totally should not do. For my december production, I bought 60 meters of a lighter turquoize chiffon with a subtle paillette and a lurex thread in the fabric. It is gorgeous and doesn’t match the lycra. Go figure.

Muwashahat girls: a quick update

The dress rehearsal on Thursday as great, it’s looking great! Here are two pictures taken earlier this week. Keep in mind that the jackets have flowing half-circle sleeves and we are holding chiffon handkerchiefs in the finished version. This is Roos, showing her jacket and the pants + skirt:

And this is Shaia, trying to find eough fabric to make the last pairs of chiffon sleeves. This is what my livingroom looked like on Wednesday, I’m grateful to the person who invented the vacuum cleaner.

Costuming marathon: Muwashahat

A couple of my friends and I took a workshop Muwashahat with Farida Fahmy last year. Roos Belinfante is having her annual student show on May 15th and we wanted to do a new group choreography, since practicing for the RonDom Buikdans show worked really well

In the past five weeks, we’ve made the choregraphy and learned the steps. We still need to refine and adjust stff to ge better synchronisation, but it is looking good! Second project was our costumes: this is the first time that we are making matching troupe costumes. 6 people, different body shapes and various color preferences. We took a long, hard look at the video material from Farida Fhamy and decided that we wanted jackets, chiffon skirts/sleeves/handkerchiefs and matching pants. Here is a snapshot of Farida:

April 23th: Roos, Hadyr and I met up at the fabric market in Utrecht. After searching for two hours, we choose our fabric:

1. chiffon in blue/turquoise print with roses
2.matching satin in the same print
3.Dark blue nicky velours for the jackets
Here are some snapshots of the fabric:

Satin:
May 1th: First sewing marathon
Hadyr and Isandria come over to my place (we solemnly decided to make my house Costume Head Quarters). We work for five hours andmake the pattern for the pants, pattern for the skirt and we pin/cut/sew two pairs of pants and three skirts. I’m appointed team manager, delegatingand coordinatng cosutming taksks between the sewing team (me and Isandria) and the pining/cutting team (Hadyr/Isandria)
May 4th: second sewing marathon
Roos and her daughter come over. We cut the remaining fabric, add waistbands to the skirts and make two pairs of pants and manage to cut all of the skirts. This took another five hours. We learn that we don’t have enough fabric to make the last two pairs of pants, and Ros and I decide to go to the fabric market that Saturday for the remaining satin + extra fabric for the jackets. The jacket are made by Kandila, a friend of Roos. We are all very happy that she agreed to do this for us: we are of course paying her fher work.
May 7th: second visit to the fabric market
The man who sold us the fabric tells us that he is all sold out. Argh! We find another fabric in similar colors but a different pattern for the pants but are bummed that we couldn’t get the original fabric. Buying the additional fabric for the jackets is easy.
May 11th: Third sewing marathon
It’s busy at Costuming HQ: Shaia, Roos and Gunesh arrive around 11.00. Gunesh brought her sewing machine, as we will need to do a lot of hemming today. We hem and finish our own pants/skirts and we all mark our own skirts/pants by sewing a scrap of fabric to the inside. Roos a leftover from the pink lycra costume from 2010, Gunesh a scrap from the green velvet costume 2011, and Shaia a piece of fabric from the pink/wite polkadot dress from 2009. We manage to cut six sets of sleeves from chiffon scraps. This sewing marathon lasts seven hours.
What we need to do to finish the costumes before our performance on May 15th:
Thursday 12th: dress rehearsal, we all have our jackets by then. Everyone will receive a pair of chiffon sleeves, to be added at home
Saturday14th: go to fabric market and buy matching chiffon for the handkerchiefs. Cut out 12 handkerchiefs
unday 15th, 12.00: arrive in Bussum or the show, on time for the run-trough of the show. Hadyr ad I will perform our Turkish duet, and the troupe will perform the Muwashahat.
Will we finish our costumes in time? Will the man at the fabric market have matching chiffon or do we have to make do without? And how about the jackets, will they be ready tomorrow? Stay tuned for the next episode of Costuming marathon: Muwashahat!