Black velvet dress with multi color godets

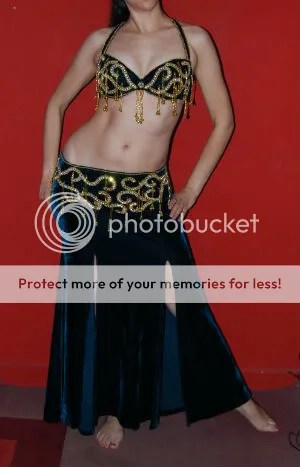
The back and multi color costume was a refurbish project in 2015. Multi color means that there are a lot of skirt options and I wore this costume with purple, yellow or pink circle skirt. But it would look really awesome with a matching black and multi color skirt! Off I went to the online fabric store, ordering black stretch velvet and chiffon in four bright colors. The fabric arrived, I put it in my closet and waited two years to give the fabric time to mature. I’m kidding, I have more ideas and plans than I have time so that’s why it took me so long to get started.

The pattern

Pattern straight skirt with godets

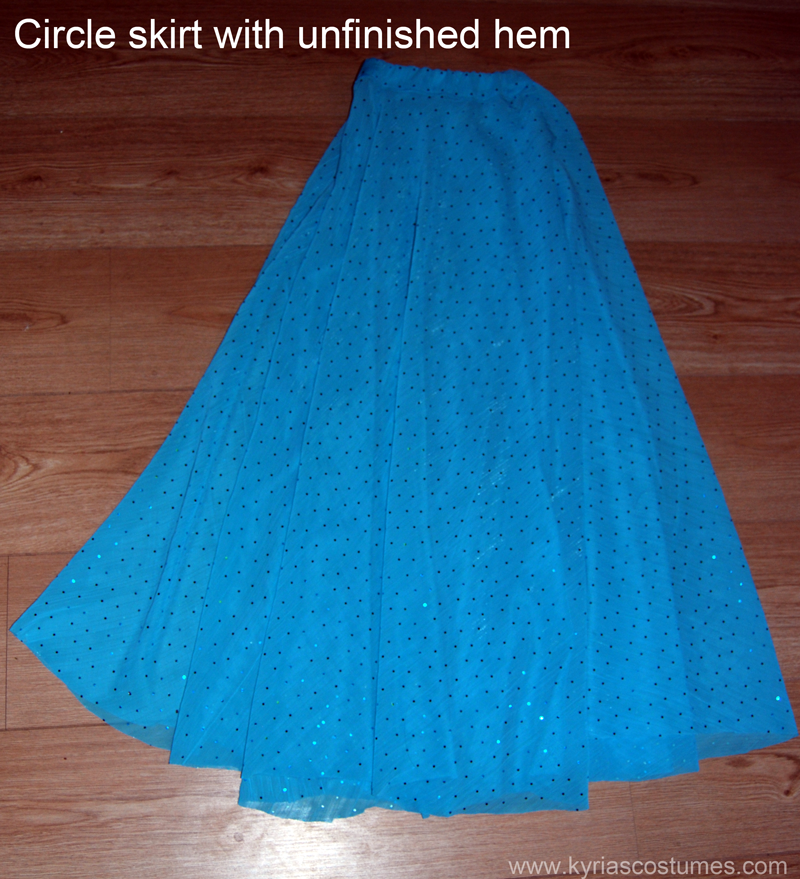
I choose the easiest way: by starting with a rectangle as a basic skirt and adding slashes for the godets. That worked like a charm! I originally intended to make eight slashes but I ended up with seven. The side where the skirt closes functions as the seventh slash.

My idea was to use two types of fabric for each godet, allowing the skirt to show different colors while dancing. I got that idea from watching a dancer in a Bella costume that had multi colored godets. After cutting quarter circles out of chiffon, I picked the color combinations (green with pink and blue with yellow) and attached the matching quarter circles together.

The job of adding the inserts was faster and easier than I expected. I put the insert on the fabric with the outside parts of the fabric together and start sewing from the top of the slash, down to the bottom. Repeat for the other side, always staring at the top of the slash and sewing towards the hem. Why? because some pieces turned out longer and some shorter. The last godet was added by putting the sides of the skirt together and closing the seam, turning it into a large tube with chiffon inserts.

The top and the bottom

While I was planning on making a skirt, I knew that wanted to cover my belly for this costume. Instead of measuring the skirt from my hips down to the floor, I measured from below the bust line down to the floor so it would go all the way up to my bra. To perfect the fit, I put it on inside out and used pins to indicate where the skirt would need to be tighter (around the waist) or wider (around the hips. I then took the skirt off and sewed along the pins.

img_0909
The skirt/dress laid out on the floor

The top has a tunnel of 2 cm wide elastic, plus I added a loop of black elastic that starts from the side below the bust, goes around the neck and then down to the other side. Snaps were sewn on the edge in six places to attach to the bra.

Hemming this skirt was done by putting the skirt on a clothing dry rack, measuring the appropriate length and cutting it while hanging. I added fishing line to the hem afterwards so I knew that it didn’t have to be very exact. Look at that pretty fluffy hemline!
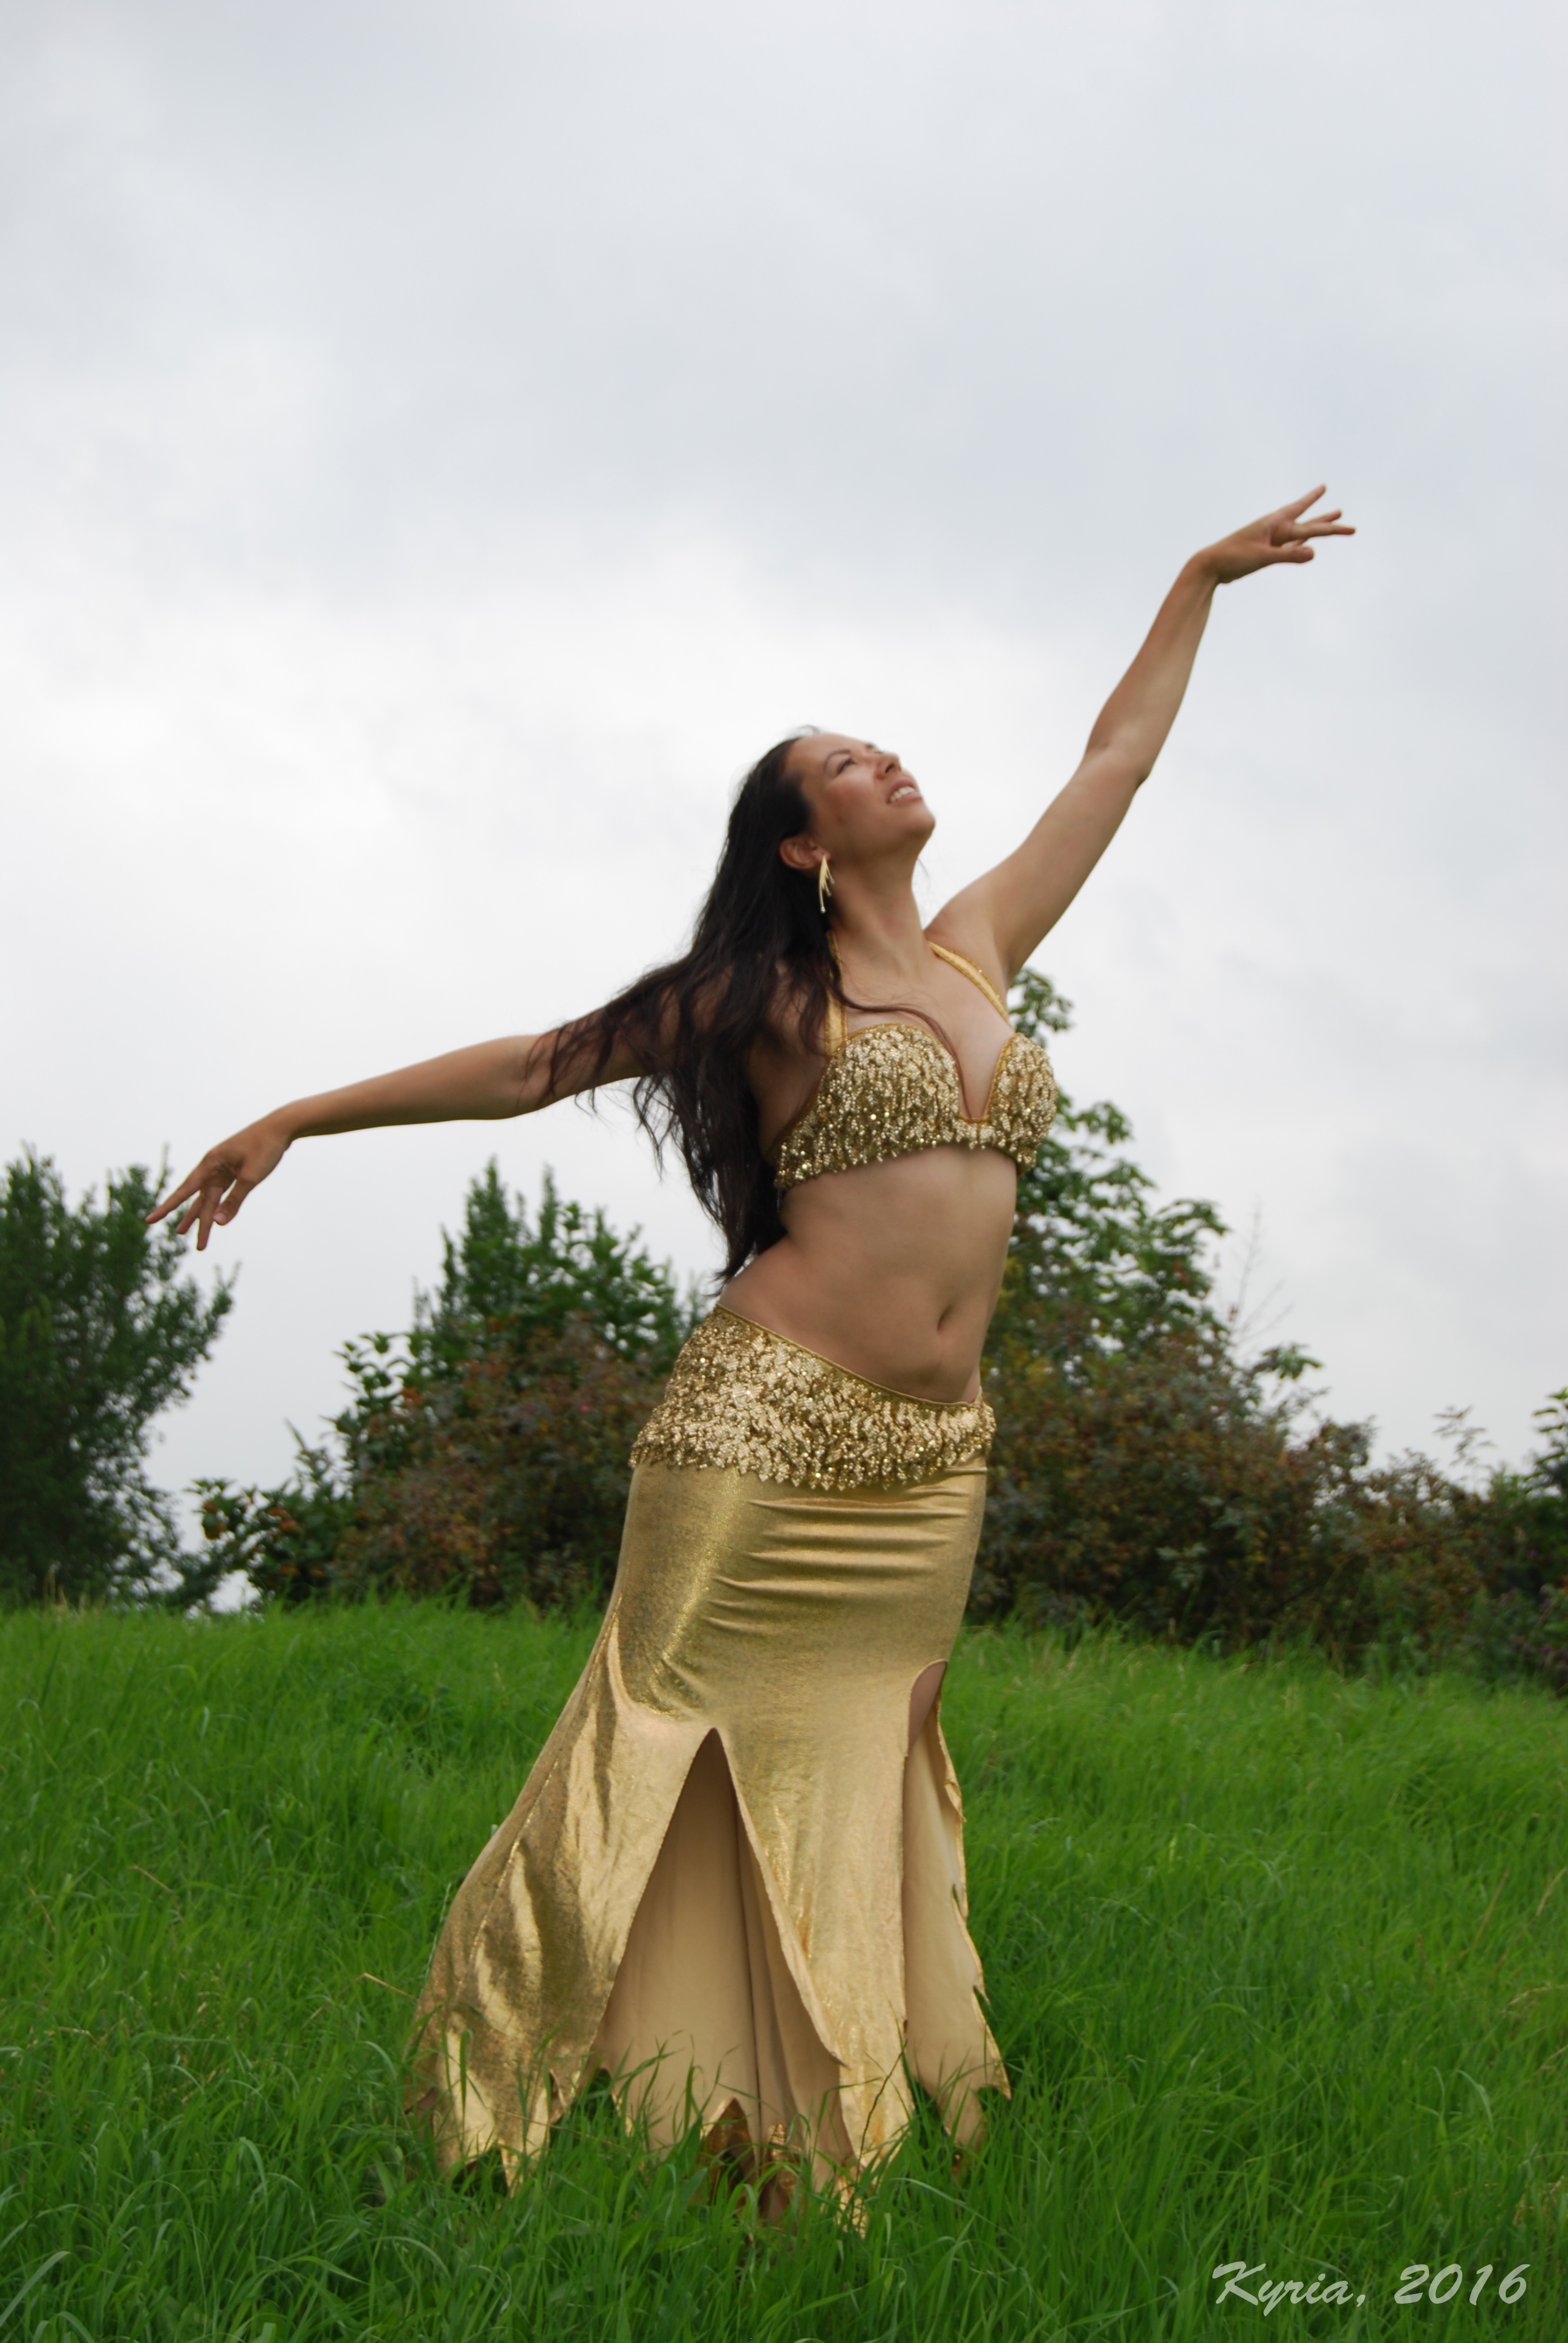
img_0912
All the ruffles!

The finished look

This skirt needs to be spinning to see it’s full effect and this is the best shot I have so far. It’s very comfortable and I am happy with the result. My plan is to make a matching top as well, in case I want to go for a more covered look but I am putting those plans on the back burner right now. Maybe wait another two years before I get started on the top šŸ˜‰

Blackmulticolor 02
Spinning around in the studio

I am a professional bellydancer, costume-a-holic and dance studio owner living in the Netherlands. My passion is teaching and performing bellydance and Iā€™ve been doing that for almost two decades. I am a teacher at the online Belly Dance Business Academy, where you can find courses and workshops to help you grow your belly dance business. If you like to be kept in the loop, please like Kyria Bellydance on Facebook , follow me on Twitter or find me on Instagram.Ā 

Lengthening a skirt

Living in the country of some of the tallest people in the worldĀ means that I am used to being fairly average in length. I am 176 cm tall, which is three inches short of being six feet tall. Or, as google informed me:

length according to google.png

After buying several second hand costumes through the internet, I noticed that I am roughly 10 cm/4 inches taller compared to most dancers. How do I notice? Because most of the time, the skirt is too short. I hate short skirts, because it breaks the body line and it looks like I’ve outgrown my costume lengthwise. One of the reasons for me to start making my own clothes was because it was nearly impossible to find pants that were long enough.

A while back I bought a gorgeous second hand costume that I suspect is a Hannan. No label though, so I can’t be sure. The beadwork is superb, very pretty with holographic sequins andĀ seed beads. And it also happens to be too short. Hm. I’ve worn this costume before but it never quite felt right. This summer I am overhauling my costume stash and fixing all the things that need to be fixed and this costumeĀ was high on my list.

As an extra challenge, I try to use the materials I already own, as my stash is overflowing. In May I turned two blue chiffon veils into a circle skirt. I needed a blue circle skirt for my student recital and the fabric was a bit too heavy for intensive veil work anyway. The left over scraps were turned into one long piece of fabric, app. 12,5 cm/5 inches wide. I didn’t measure the length but it was slightly longer than the edge of the skirt.

IMG_4845

I finished all edges of the fabric strip, then used a long, loose stitch along the top edge of the strip. Pinning the beginning and the end, I started gathering the ruffle and pinning it onto the hem of the skirt. It took a while to get the fabric evenly distributed but it worked. I used my sewing machine to secure the strip to the skirt and I need to hand baste the edge to finish the seam neatly.

IMG_4846

I am a professional bellydancer and costume-a-holic living in the Netherlands. My biggest passion is teaching andĀ performing bellydanceĀ and I intent to continue for quite some time! If you enjoyed this post and like to be kept in the loop, please like Kyria Bellydance on Facebook or follow me on Twitter. Leave your questions or comments in the box below, or let me know through Facebook.

Gold metal mesh costume is done!

Behind the scenes I’ve been working on the gold metal mesh costume. I just didn’t have the time to take pictures or write about it, on account of being to busy with end of the year recitals, family time, having camp fires in our back yard and playing real life scrabble with my husband as a Dutch version of date night. The scrabble thing is really confusing as the rules are completely different compared to Wordfeud. Now that I confessed that I am one of the three people in the world that still play Wordfeud, this post can’t possible get more embarrassing. Or, if you play Wordfeud too, want to prove that there are more than three people that still play thisĀ gameĀ and want to play with me, send an invite to Mekyria.

Back to the gold mesh costume! The last time I blogged, I had about one third of the belt covered with small gold mesh pieces. It took a bit of times as I have an impressive hip size, which comes in handy being a belly dancer. After I covered the whole belt with gold mesh, I added the closures and sewed a bit of elastic to the upper edge of the belt. It gives it a bit of extra body and prevents the belt from slipping down during shimmies.

The good news is that the costume is now wearable as it is, with the belt, bra and skirt fully finished. To celebrate, I decided to go out to a local park and take some pictures. They look good combined with wings. For the future, I’d like to add some upper arm bands in the same fabric and maybe add the left over mesh pieces to the slit of the skirt, to give it some weight. Edging the whole skirt with the mesh pieces might be a bit too much, as the mesh tends to get wrapped up in itself or get stuck on another piece of mesh. To keep it safe, I am storing the bra and belt in a separate bag with a zipper, where I can put both belt and bra in and keep them flat.

I was going through old pictures and I noticed how I had a habit of finishing a costume and then getting out of the door to get some nice pictures. And it occurred to me that I hadn’t done that in…. three to five year? I decided to dress up, head to the local park and get some really quick pictures with the tripod and the remote control. If you look closely, you’ll see how I’m still holding the remote in my hand in some of the pictures šŸ™‚

gold mesh 01

I got lucky with the light. It was cloudy, creating nice, even lighting. After playing around with the wings, I decided to take a couple of shots to show just the costume. I prefer wearing the belt asymmetrical, which can be seen well in this shot:

gold mesh 3

And the costume is not too shabby looking from the front either:

gold mesh 04

In all, I am very pleased with how this costume rehab turned out. All I need is an occasion to perform in it and see how it holds up to a fifteen minute routine. My initial plan was to shoot some video material as well, but the wind disagreed and kept blowing my hair in my face, and trying to get my wings. Maybe some other time.

I am a professional bellydancer and costume-a-holic living in the Netherlands. If you enjoyed this post and like to be kept in the loop, please like Kyria Bellydance on Facebook or follow me on Twitter. Leave your questions or comments in the box below, or let me know through Facebook.

I performed ATS again after twelve years of Egyptian and Turkish bellydance

Summer is really kicking off here. My last class was at the end of June and yesterday my students and I performed at the student recital of my friend Roos Belinfante. This year was extra special because it was my first semester of teaching after my pregnancy leave. As an extra challenge, I dedicated ten of the intermediate classes to learning American Tribal Style (ATS).

I am super proud of my students doing a completely improvised ATS performance after only ten classes of basic ATS. It was also a good occassion for me to get my tribal costume items out of the closet. If you have never seen an ATS performance or tried a workshop or class, I highly recommend it. It is a different, very structured dance form that utilizes belly dance moves and puts the movement in a different (completely made up, based on various cultures) setting.

Here’s a picture of me in ATS gear, taken in 2007. I made the bra, choli, headband, skirt and tassel belt.


It’s been roughly twelve years since I was part of an ATS group that practiced weekly. Teaching the material was a blast of the past. Ah, how young I was, how inexperienced in belly dance and how much time I had for sewing! Linking ATS to that time in my life made it an extra intense experience for me. Here’s a group picture taken before our performance last Sunday. How adorable are we? Can you guess how many items are made by me?

   I used the same skirt from the previous picture plus two more 26 yard skirts I made in 2005. For this occassion I made five wide headbands covered in velvet. The night before the recital was spent sewing leaves and flowers to my own headband on account of our daughter having a cold and waking up every hour or so. If I am going to be awake I might as well do something useful. Plus big head stuff distracts from the under eye bags.

The silver coin bra still fits with some adjustments. I had to remove the padding and change the straps because breastfeeding turned my B cup into a D.

What belly dance costume item has been in your closet for years? 

Different ways to hem a circle skirt

Different circle skirt hemming techniques

In my last post I mentioned a quick way to cut the hemline of circle skirts when you’re in a hurry. After cutting, the hem still needs to be finished! This blogpost is about the different ways to finish the hemline of a circle skirt.

Determine the best technique for hemming: the shape of your hemline and the fabric of your skirt

Before I start on the techniques, let’s have a quick look at the shape of the hemline and the material of the skirt. These two factors are important for deciding which type of hemming works best for your project. A circle skirt is made out of panels cut in a circle shape, creating a rounded hemline. This is important as rounded hemlines can’t easily be folded over. Try it with a circular piece of paper: if you fold the edge inwards, several folds along the edge are needed to fold the paper inward all along the edge. The same thing happens with fabric:Ā  the ‘ fold over and stitch-technique’ will create a messy hemline.

The second factor is the fabric. I used a chiffon like fabric: a semi transparant woven fabric. There is a slight stretch to it (normal synthetic chiffon doesn’t stretch), making it easier to use techniques that require a bit of stretching and fiddling with the fabric while hemming.

What are these ‘techniques’ I keep talking about?

When I mention ‘technique’ I am talking about different ways to sew something. For instance, a hem can be finished by a fold-over-and-stitch- technique, or a rolled hem technique. In both cases, the skirt has a finished hemline. The result of each technique might be slightly different.Ā  That’s why it’s important to learn about different techniques. Remember my adagio costuming is about what works for you? Sometimes a rolled hem might work, sometimes a serger might be the answer to all your problems. Fold over hems are prefect for straight hemlines and give a great result, but are unsuitable for curved hemlines. Being able to use different techniques and being able to judge what technique will give the desired effect is the sign of a good seamstress.

My favorite techniques for neatly hemmed circle skirts are:

  1. The basic rolled hem
  2. The serged hem (only works if you own a serger or are close friends with someone who owns one)
  3. The rolled hem with fish line finish (adding fish line)

This is a circle skirt with unfinsihed hem, to give you an idea of how the hemming technique can change the look of the skirt.

Circle skirt with unfinished hem

The basic rolled hem

Use the fingers of your right hand to slightly roll the edge of the fabric inward, and stitch right on top of it so it stays put. The fraying edge of the fabric is neatly tucked away. The nice thing about this technique is that it is a fairly simple concept. The tricky bit is that rolling fabric by hand while operating your sewing machine can get messy and result in uneven, quite big, rolled hems.

I highly recommend investing in a sewing machine foot called the ‘rolling hem foot’. What it does is roll the fabric for you, as long as the fabric edge is fed into the foot in the right way. Sometimes it is included with your machine but if it is not, go to your local sewing machine store and order it. It will change your life for the better. With a rolleed hem foot, creating even, neat and narrow rolled hems is a walk in the park. It takes a bit of practice and after that you’ll be hemming in no time. Roll hemming creates a narrow, roll like hem.

The serged hem (you need a serger for this one)

I am slightly envious of people who own a serger. It’s an amazing machine that can stitch, finish and cut fabric at the same time. It’s the reason why store bought items always have such nice finished seams. If you own one, it will also be the bane of your existence. Operating one is not easy and since it uses 3-5 threads at the same time, a lot of things can (and will) go wrong. However, if you own a serger or are close friends with someone who owns a serger, finishing the hemline with a serger is a great option. It will create a narrow, flat, flexible hem. Special thanks to Brenda for serging this skirt for me šŸ™‚

Circle skirt with serged hem

The rolled hem with lettuce finish (adding fish line)

If you’re into fancy finishes, try edging your circle skirt with fish line! It is a relative easy proces. Instead of a normal roll hem, sew fishing line inside the rolled hem. The fishing line comes from a spool and thus creates a meandering, lettuce like effect. Sparkly belly has a more extensive post about this technique on her website.

This technique creates a hem that is rolled, and falls in natural curles and curves.

Circle-skirt-fishline hem
Circle skirt with rolled hem and fish line

For tutorials about how to add fishing line to the hemline of a skirt, try this curly hem tutorial on Youtube, this tutorial by Sparkly Belly. It is fairly easy to add the fishing line to the rolled hem and I really like the results. So floofy!

For your enjoyment, here is a quick overview of the effect of the different hemming techniques.

Different circle skirt hemming techniques

If you enjoyed this post, please like Kyria Bellydance on Facebook or follow me on Twitter. If you have a question or comment, let me know through Facebook and I might write a blog post to answer your costuming question.

Thanks for reading and see you soon!

A quick tip to cut circle skirts to the desired length

It’s been quiet on this blog for a while. Rest assure though that I am still costuming my heart out! Finding the time to blog about it, now that’s the real challenge. Instead of showing you stuff I madein the last couple of weeks, I’d rather start with a quick update on things that are going on on my (our) lives.

1. House

We’re remodeling the attic! Four to six builders took over our house and transformed our attic into two decent sized bedrooms. They build two dormers and replaced the old window frames at the front of our house. Our dog acted as their supervisor and kept a close eye on things.

Dog supervising construction

The downside of remodeling? Once the builders are gone, it’s left to us to finish the job. Like plasterig the walls, painting the woodwork, dragging all the stuff we stored in other parts of our house back upstairs. We’ll be busy with finishing the job well into July. But look at that space! For reference, the old roof is the diagonal beam in the right part of the picture.

The dormer half done

2. Dance

There were hafla’s, mermaids and drum solo’s. I did a performance as the moon that I am very pleased with. In a costume that I borrowed from a friend (thanks Laudie!) because I didn’t finish the moon goddess costume yet. These are my students and me performing a drum solo with my dance friends from Sense of Bellydance drumming. That’s me on the right, with the blinged up old school Bella. My weekly classes are almost at the summer stop, which makes me sad and happy at the same time. Sad because I love teaching and happy because I am run down and tired and would love to have a break.

Drum solo hafla Zeist3. Costuming

See those blue skirts in the previous pictures? I got some left over fabric that I am transforming into costumes for my student recital next Sunday. By ‘some left over fabric’ I mean I had about 25 meters lying around. It was inexpensive and the guy at the fabric market offered me a discount for buying two bolts. I’m sure you’d done the same! There’s not enough to make double layer chiffon skirts for everyone, so I made five single layer chiffon skirts instead. Here’s a quick tip for hemming circle skirts when you’re in a hurry and the skirts have to be ‘one size fits most’.

Hang them on a clothes horse or laundry line and leave them there for about seven days. The threads in the fabric need to adjust to their new position and gravity needs time to work it’s magic. Some parts of the fabric will stretch out a bit, making the hemline uneven.

If I had time, I would put each skirt on my dressform and carefully cut the hemline to even it out. If I had more time, I’d go over to a friend, who would lovingly cut the hemline to my personal length while we eat chocolate, share bellydance tips and fawn over the latest costume designs. Unfortunately, my time is limited (see 1. House and 2. Dance). When I run out of time, I create shortcuts that help me do the job.

The quick and dirty way to cutting hemlines on multiple circle skirts

Take a circle skirt that is already at the correct length and hang it next to the unhemmed skirt(s). Make sure that the skrits are pinned on exatly the same way at the top, otherwise your hem might come out a bit wonky. I am aiming for slightly longer skirts with the last three because I am going to finish with a lettuce hemline. Using the finished skirt as a guide, cut the hemlines on the unfinished skirts.

Hemming circle skirtsTadaa, the skirts are ready for the next step! More about different ways to hem a circle skirt in a later post.

That’s it for today! See you soon šŸ™‚

If you enjoyed this post, please like Kyria Bellydance on Facebook or Twitter. If you have a question or comment, let me know through Facebook and I might write a blog post to answer your costuming question!

Thanks for reading, and cut those circle skirts ’till you can cut no more!

Minty fresh costume part 2: the skirt

Costume sketch for blue/green costume

A couple of months ago I started working on a blue/green costume. I covered a Dina bra base, rope beaded the edges and covered the strap. Then life happened: I was the producer/teacher/stage manager/sound engineer for the ‘Arabian Nights’ shows in December, that certainly was a lot of fun. During Christmas I had a personal matter that asked for all of my attention and after New Year I needed to work on promotimg and teaching my weekly classes.

All very valid reasons why I didn’t continue working on the minty fresh costume. What also didn’t help is that I cut into one of the backpanels of the skirt by accident and I don’t have more of the blue fabric. The skirt design needed to be completely redone to make up for that mistake.

Below is the drawing of my original design plu

Costume sketch for blue/green costume
Costume sketch for the minty fresh costume. A close up of the bra is in the upper left corner

s the updated design. As you can see, there’s a bit of an hourglass line going on in the skirt that should work wonders.

I find it hard to continue and finish costume projects that are put on hold for some time. A good example is the green velvet costume that I started in 2007 and finished in 2011. An even better example is my to-do box that contains costumes that I will probably never finish. But! Finishing a project is very important for my state of mind. Unfinished projects are like skelletons in my closet, they are in the back of my head taking up space that I rather use for new projects.

with that in mind, I cut the new patter pieces and made the matching skirt. Sure, it isn’t a complete costume yet, but all it needs is some chunky beading and a bit of fringe to take it to the next level. And with that in mind, I am putting it back into the to-do box.

I dare you to post about one of your unfinnished products on your blog or facebook. Tag me and we can act as an ‘unfinished project support team’ for each other.


Green velvet costume part 5: back of the skirt

Warning: this post contains images of extreme amounts of rhinestones and may cause temporary blindness due to all the glitter.

In part 4 you could see the progress on the front of the skirt, replacing the old beading with new beading. I’m not extremely pleased with the beading on the front, as I think the middle curl is too small. It would look better if it was bigger, but then again I vowed to myself to finish as many projects as I can in 2011. On January 1th 2012 everything that is left from my fabric stash, sequins, rhinestones, etc, will be given away to people who will make good use of them. My standards of what a finished costume should be have been lowered so I can get away with making more costumes this year.

Let’s travel back through time and look at the beading on the back of the skirt that I did in January:

I added gold cluster fringe too but didn’t take a picture. I removed the gold sequins and laid out a new pattern with rhinestone chain. I left yellow threads in the fabric because I used it as a general guide to where I wanted to place the curls.

I went with the ‘looks symmetrical but is asymmetrical’ trick as I like costumes to contain little surprise elements. The human eye is drawn towards symmetry, yet lingers longer when it discovers a conundrum. Like a costume that looks symmetrical at first glance, but turns out to be asymmetrical at second glance. Good to know that my degree in psychology is put to good use:

While I was finishing the skirt, it bugged me that the upper edge of the bra weren’t completely smooth and showed a tiny extension where I had cut off the original straps. So opened up the lining on the bra, removed the beading on the edge and fixed it. ANd this is what the costume looks like when worn together:.Front:

Back:

The only thing left to do is making gloves/armbands and a headband, edged with gold seed beads. I also wanted to add a waist strap to the skirt, starting at the indentation in the waistband on the left hip, traveling around the waist and back to the waistband. For now I’m going to let the costume rest, as I have a student recital next weekend and my students might need to borrow skirts from me. I have two huge pieces of chiffon like fabric that I want to turn into skirts. To be specific, I’ve had those two chunks of fabric for over three years now, with the intention of making skirts. It’s a good thing I’m making an extra effort to use the stuff in my stash this year!

Green velvet costume part 4: finished the bra and redoing the skirt


It’s been a while since I’ve updated on the green velvet costume, but I assure you that there have been tons of things going on. I finished the bra about one or two eweks ago and posted a close-up on bhuz, but I didn’t post it here because I wanted to give you a full update.

Here’s a rather blurry picture of the bra:

I beaded the skirt with sequins and bugle beads in January, but I needed to redo all the beading. So….. here’s a before picture:

Creating the new pattern with the rhinestone chain:

And filling the design out by edging all the curls in gold seedbeads:


Every curl takes about 30-50 minutes to complete.

More on the back of the skirt tomorrow.