I did mention that I have little time on my hands, right? The last couple of weeks I made it a habit to bring a costuming item to the couch when I watch tv and this really helps me to get stuff done.After the last post I promised to post pictures of the bra base seperately because I assembled it by using my sewing machine.
When I started costuming, I read all the available tutorials and decided early on that I would use my sewing machine. My arguments are that all the straps can be made, covered and added with a sewing machine. Why would I spent hours on sewing them by hand if it only takes 45 minutes with a sewing machine? Machine stitching is just as secure as hand stitching, I have never had a bra strap give out on me. The thrid reason might be because hand stitching delivers a neater result. However, I usually cover my bra completely with beading and sequins. If you have never tried using a sewing machine to assemble a bra base, I urge you to give it a try. After all, normal bra’s are also made with a sewing machine. Just be careful with the underwire and the many layers of fabric, causing your needle to break.
The reason why I wanted to blog about the bra seperately is because I also covered the straps in sequined netting before attaching them to the bra thus saving even more time! You’d think with all this time saving I’d have more time to spend lounging around watching bellydance clips on youtube but that didn’t happen yet.
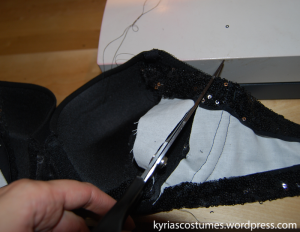
I started by cutting of the side straps and shoulder straps of a regular black push-up bra.

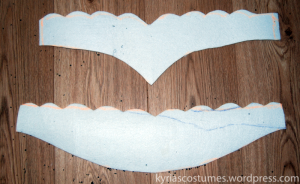
I put the bra cups on a bit of white cotton and drew the shape of the side straps. My side straps are straight at the bottom and slightly curved on top and I draw them on sight. It has always worked for me. I made the straps significantly longer (roughly 3″/7.5 cm each) to create a bigger overlap in the back. I like to add hook and eye closure and velcro to my ribcage straps, I need the overlap to add both types of closures.
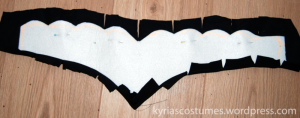
I decided to cover the whole thing with sequined netting instead of beading by hand. For the straps, I needed to cover it in sequined netting before attaching the straps to the bra. I cut out two layers of whte cotton for both sides, then covered both straps in black lycra just like the belt. Usually when I cover a set in fabric, I fold it over the edges and hand stitch into place on the inside of the costume. With sequined fabric, this is not a good idea. Sequins in close and constant contact with your skin itches more than an ant colony with a grudge.

My grand master plan was stitch the sequined fabric to the top of the straps, cutting it off a couple of mm from the edge. The resulting slightly frayed edge would be held in place by a zig zag stitch, ensuring the sequins would stay on the fabric and hidden by beading along the edges with gold seed beads. The side straps were thus covered with this method, and attached to the bra by machine. Pin them into place, then slowely double stitch along the egdes of the wire in the bra. I broke two needles in the proces, other then that it was smooth sailing.


The shoulder straps were wraught in a similar way and attached to the inside of the bra cups. I kept the rest of the bra cup in it’s original shape. The devious thing about my plan is that I didn’t cover the bra cups in lycra because they are made of black fabric. I covered the connector with a scrap of sequinend fabric and stitched it down by hand. Then I took a rectangular piece of sequined fabric and covered the bra cup.

I like to cover my bra cups by starting on the straight edge of the bra and folding the fabric so it neatly covers the joint with the cup connector. From that point, I pin the fabric to the bra moving outwards. First I pin the straight top (in this case I used the sequined fabric to cover up the original bra shape) and down to the top of the side strap. Returning to the starting point, I pin the fabric along the lower edge of the bra, making sure to keep the sequined fabric on the outside. I end up with a sort of flap of fabric.

In this case, I cut off the flap, folded the edges to the inside, pinned and hand stitched into place. This creates a neat seam from the side strap to the apex of the cup. If you are going to over the bra with beading, don’t worry about creating even seams. If you plan on not using much decorating, pay extra attention to make this seam as neat and even as possible.


Still lazy, I sewed the fabric to the edges of the bra cup with my machine.

Ta-daa, the complete bra base covered in sequined fabric! The total time to create this bra from scratch was two hours. Here is a gratatious shot of the bra, belt and armbands all covered in sequined fabric.

In the next post, I’ll tell you all about decorating the bra.


