This blog is about creating the gold belt and appliquées that spice up the purple velvet dress I made in the previous costuming post. If you want to know more about the techniques that I used, check out this blog where I review the Swirly Belt Course from Sparkly Belly. All the information about how to make this type of belt is in the course.
This blog is mostly about the process of how I made my belt and appliquées. Let’s get started! For the record, I write this blog after I finished the costume and did the photoshoot. No worries, I got it done in time!
Making a plan
When I start on a costume I usually make a lot of sketches and research fabric options but this was a bit on the fly. Instead I bought the course including the pattern book from Sparkly Belly. Any time that I could save would be most welcome. After printing the pattern book , I adjusted the belt design to make it more unique and add a bit to the sides or center so it would fit around my hips.
The holographic gold print lycra was already in my stash. I used it three years ago to cut hipscarfs for my beginners recital. Quick tip if you want to dress up your troupe or your students (or yourself) on a budget: get metallic printed lycra and cut out triangles to use as hip scarves. Works great on stage!

In addition to the fabric, I needed decoration. I found left over rhinestone chain in my stash from the Pink Turkish costume I made five years ago. Now seemed a good time to use it. I was a bit worried that I wouldn’t have enough but the project was done before I reached the end of the rhinestone chain.
I wanted an accent color to create a contrast against the gold blackground and sparkly AB rhinestones. I bought glue-on rhinestones in Topaz, a bit of a brownish gold color. Having contrast is very important to create more depth and intricacy in the decoration. I bough 5 gross (5×144) of SS6 rhinestones and 1 gross of the bigger SS20 rhinestones. That wasn’t enough. I like my costumes to be heavily beaded so I purchased an extra gross of each to finish the job.

I had a couple of smaller teardrop shaped rhinestone sew on stones in my stash and ordered some more. The big teardrop stones were also in my stash. I wanted to use them for the pink Turkish costume but never did. My recurring themes are planning on doing things and then not doing them, and buying too many rhinestones for my own good. Things could be worse.
The E600 glue was still in my sewing stash. I bought the glue for other craft projects *cough* making a mirror costume *cough* that didn’t happen…yet. Despite my hesitation to use glue on a belly dance costume I decided to go for it and see how it works. After all, it seems to work great for several big name designers and all those Russian dancers who make and sell costumes. It’s worth giving a try.
Cutting out the design
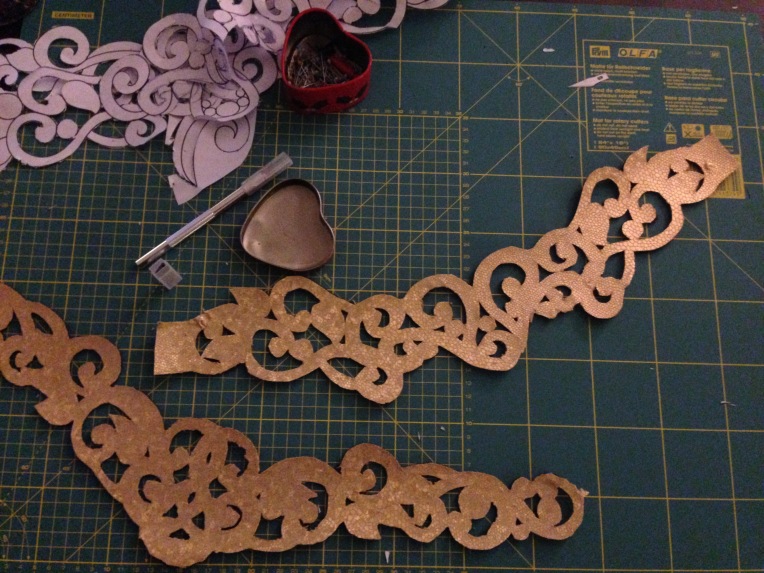
Admittedly I was in a time crunch that was really, really tight. I only had a couple of nights to finish this! It took more time than I anticipated but I still got it finished in the end. The first step was attaching the gold lycra to the belt base. That part went smoothly. Cutting the design out of the base material was a bit more daunting. The most important lesson that I learned is that scalpel knives are really sharp. It took me four hours to get to the point in the picture below. I also cut myself twice and had to stop because the cuts needed to heal.
Adding the rhinestones
I was teaching a class the next night so I started with slightly healed fingers and the knowledge that I ddn’t have to cut out things with a scalpel knife for a while. Let the decorating begin! I started by sewing the rhinestone chain along the ouside of the curls. This would give the pattern some more definition.
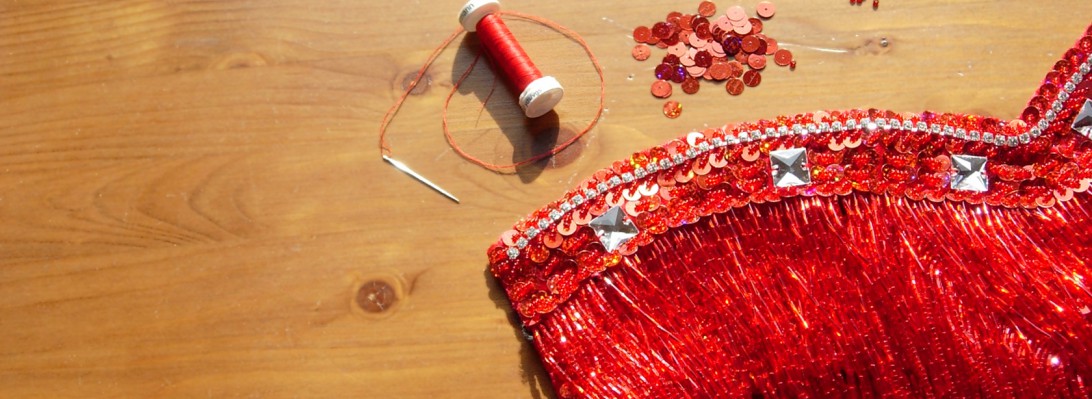
Here’s a close up of the belt. You can see the stitches where I attached the rhinestones . The Topaz stones are glued on with E6000. As you can see, I did a botch job if you look close to the edges of the fabric. I cleaned it up a bit by cutting away excess fabric for a cleaner look. Suprisingly for the overall look of the costume this doesn’t matter. It looked stunning before I fixed the rough edges and stunning after.

I spent about five hours on adding the Topaz rhinestones to the belt by hand. It was a great time to ponder over some questions in my head. I also noticed that the fumes of the glue were unpleasant. Some googling revealed that E6000 fumes are highly toxic and should not be messed with. Read about the effects on a Burlesque costume maker on this page.
I am glad that I was costuming at night when our daughter was asleep. It would have been way worse if she had been in the room while I was using the glue. A note of caution for all costumers out there: E6000 works great for glueing rhinestones, but please, please take care of your health first. Wear protective gear while working with it, or choose an alternative that doesn’t contain tetrachloroethylene.
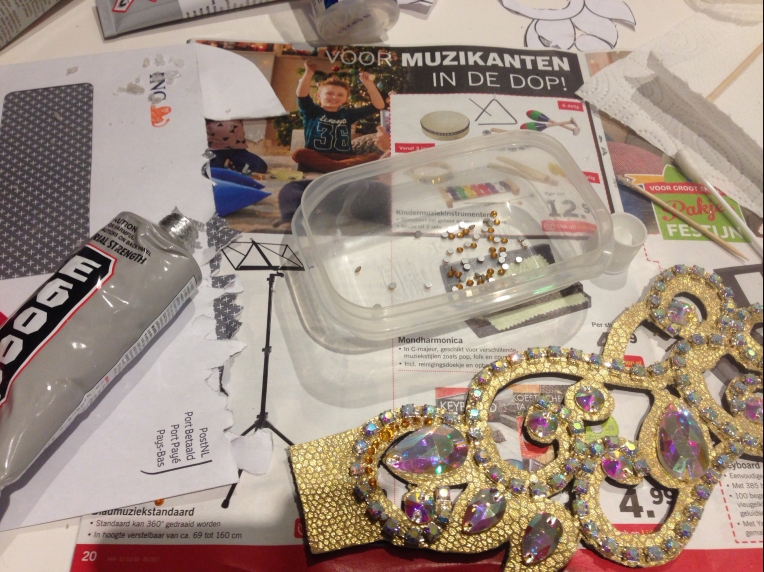
This is my work station. The small cup is there to hold the rhinestons. I covered the table with news papers to protect the surface. I used a sharp wooden stick to get the glue from the tube onto the costume in small dots. The glue isn’t runny, it’s sticky and almost gum like while it dries. I used the cotton tip to pick up a single rhinestone and put it on top of the blob of glue. Rinse, repeat. You can see the sparkle of the AB stones very well in all images.
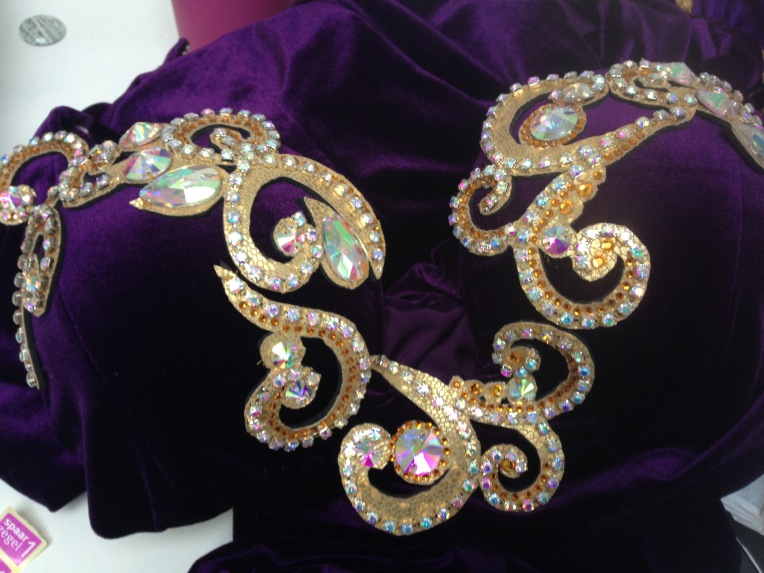
In the image below you can also see one of the smaller swirls that I made to decorate the bra. When I took this picture I was still adding rhinestones to the design, so the end result contains even more rhinestones.
And then I was done! It was a bit of an anit- climax as I didn’t have time to line so I considered it done when I glued the last stone on and sewed the hook and eyes in place so I could wear the belt. It turned out very pretty. I laid the loose swirls out on the bra and stitched them in place. For a sumptious Rococo look I let a couple of curls go over the edge of the bra to create a playful design. Here’s a close up of the bra with the swirls sewn on. As you can see, I ran out of rhinestones so the swirls on the bra are slightly less decorated. I’ll fix it once the next shipment of rhinestones comes in.
And this is what the costume looks like on the day of the photoshoot. This is a behind the scenes image taken with my cell phone. Excuse the poor quality, better images will follow once the photographer has time to process all the images from the shoot. I made matching opera gloves as accesoires to go with the dress. The tutorial for the gloves are on this page. The purple rhinestone necklace and clip on earrings were a souvenir from my visit to Miami in 2009.

It is comfortable, pretty and suits our theme of wearing purple and gold. Yay! I still have to work on this some more. I want to add extra rhinestones to the top and I have to line the belt and some of the appliquées. Maybe adding some ruffles to the lower part of the dress, as it could use a bit of drama on the bottom. Or maybe some sequins for extra sparkle. I am not sure yet. I happen to have a roll of holographic gold sequins in my stash that could work though.
What do you think? More ruffles? Leave it as it is? or do you have other ideas to make the dress even prettier? Let me know!
I am a professional bellydancer, costume-a-holic and dance studio owner living in the Netherlands. My biggest passion is teaching and performing bellydance and I intent to continue doing so for quite some time! I am a teacher at the online Belly Dance Business Academy, where you can find courses and workshops to help you grow your belly dance business. If you like to be kept in the loop, please like Kyria Bellydance on Facebook or follow me on Twitter. Leave your questions or comments in the box below, or let me know through Facebook.

I realize this post is several years old, but it made me think of a couple of things. First, Mao has a few posts on her Sparkly Belly blog for making accessories (necklace, earrings, arm cuff, bracelet) that are similar in style to the swirly pattern. I think an arm cuff at the top of one or both gauntlets might be nice. Second, there’s another Sparkly Belly course (yes I’m a fan 😁) for an Hourglass dress that’s similar in form to this, but designed for a color blocked hourglass look. Since she goes through how to make the pattern and assemble the dress, it might be a good option for someone looking to make something like this.
LikeLike
I love her post on making accessories! And the hourglass dress is a besutiful and very flattering design, I love seeing the pictures of costumes in the Sparkly Belly facebook group. Thank you for your comment!
LikeLike